
Installing Self-Service Portal Solution
This article provides the steps to install and configure the Work 365 Self-Service Portal solution using the Onboarding App
Pre-requisites
Performing this installation will require the following:
- Self-Service Portal provisioned in Dynamics 365
- Self-Service Portal Azure AD Login configured
- Self-Service Portal Azure AD Manage Licenses configured
- Work 365 Core App previously Installed
- User with System Admin privileges on tenant
Time required
This setup process is expected to take approximately 30 minutes
Additional Notes
This article covers the setup using the Work 365 Onboarding App. If you prefer to manually do this process, please see this article - SSP - Install Solution (Manual Process)
Before proceeding, make sure that there are no other solutions being installed
Procedure
- Use the appropriate onboarding app for your region
- US https://go.work365apps.com/
- EU https://go.eu01.work365apps.com/
If you see a consent message you are probably using the wrong Onboarding app. Installing solutions from a different region will break your application
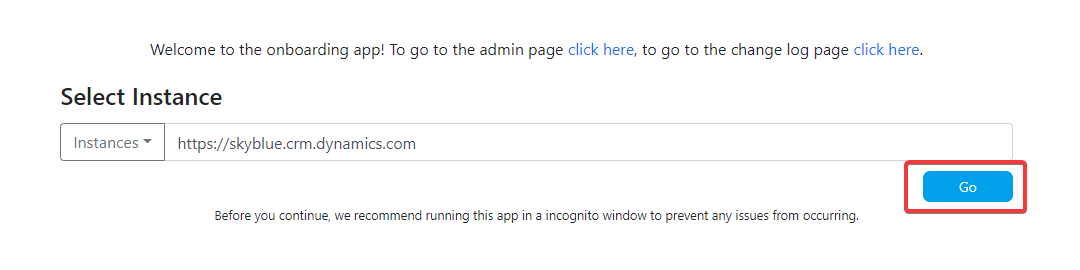
- Click on the dropdown and select the tenant where your Self-Service Portal solution should be the installed.
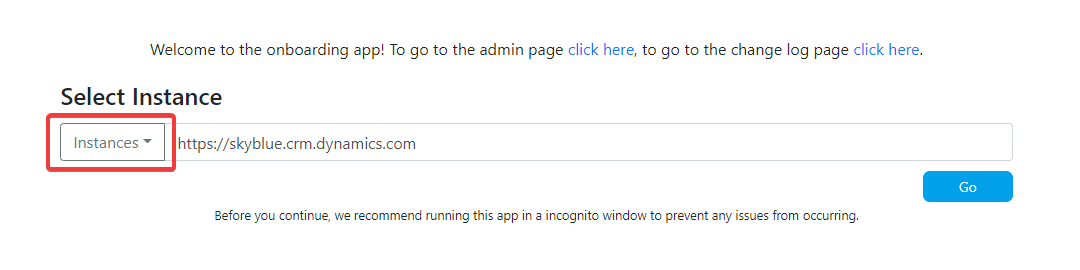
- Click the Go button
- Click on 3. Setup Work 365 Portal

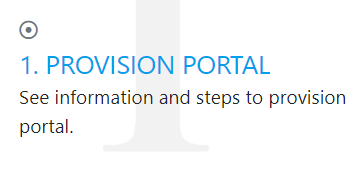
- Click on 1. Provision Portal
- Make sure you have completed the Self-Service Portal provisionstep, then click the 'Verify and Complete' button
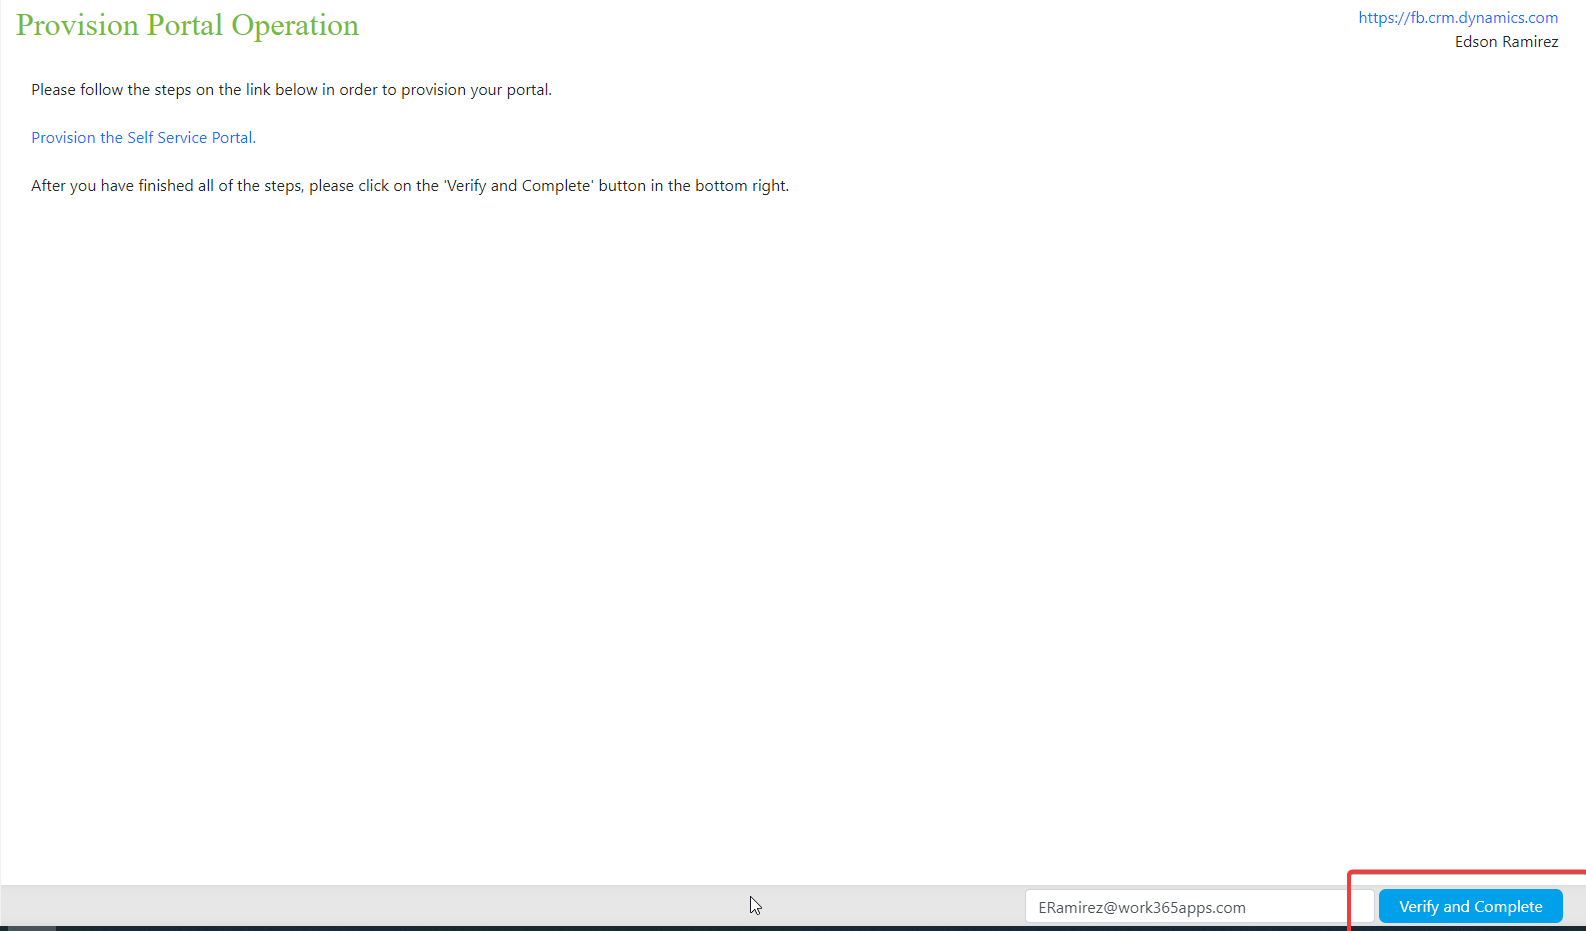
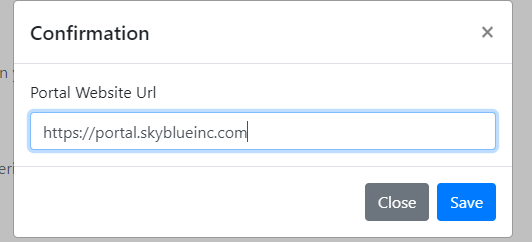
- You will see a confirmation popup, type your portal URL and click on the Save button
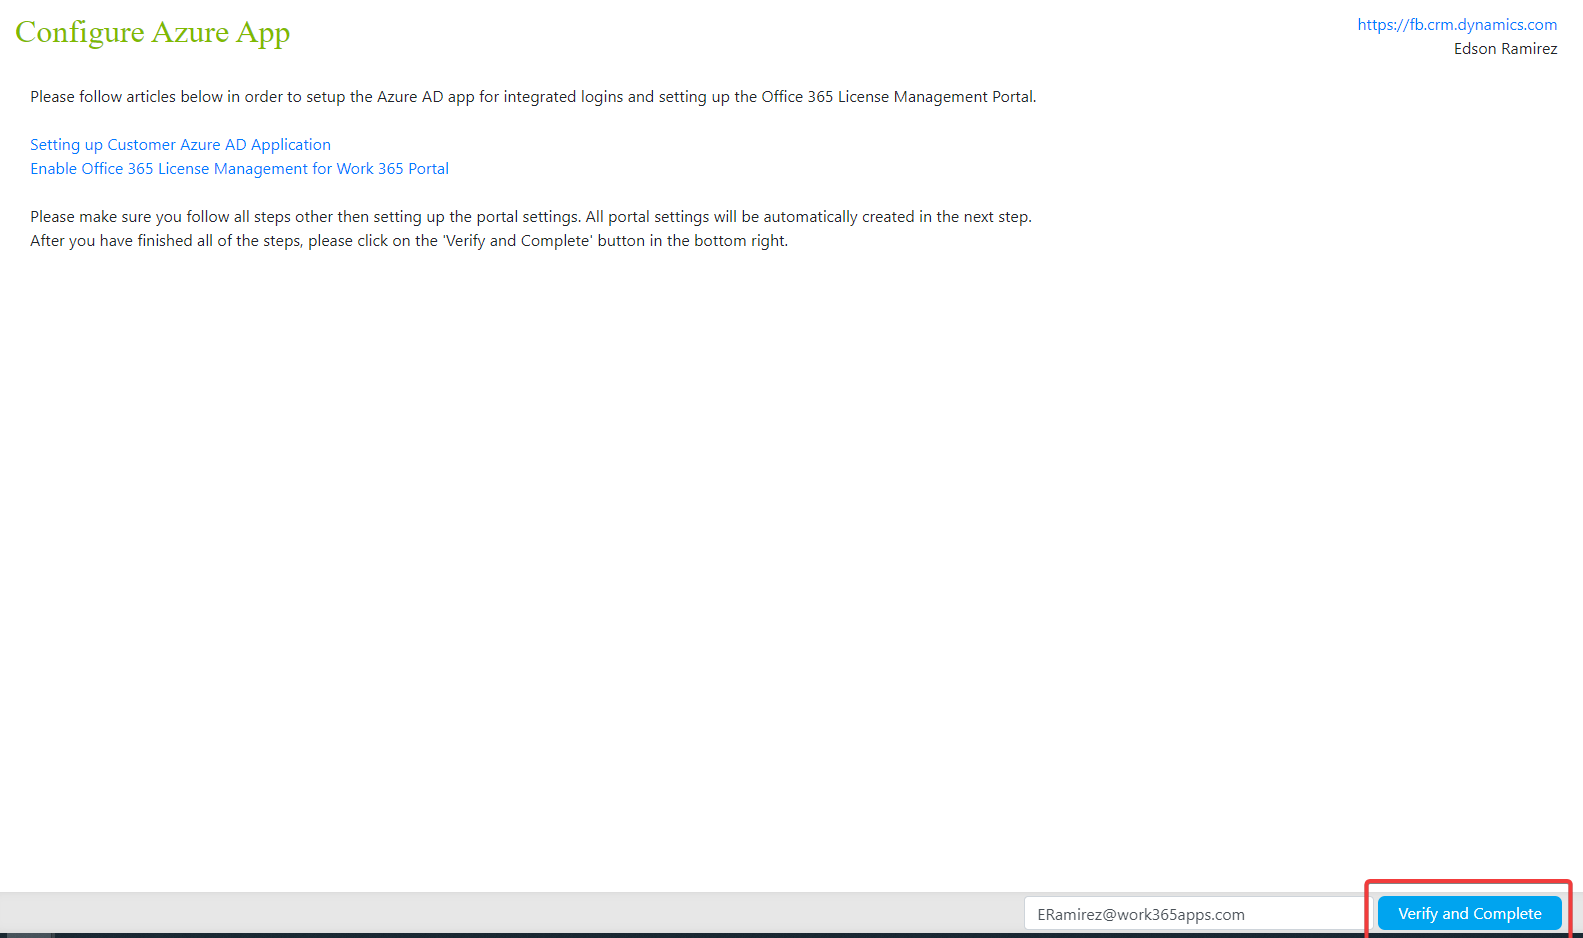
- You will be back to the previous screen, click on 2. Configure Azure AD Apps. Make you you have completed:
- Self-Service Portal Azure AD Login
- Self-Service Portal Azure AD Manage Licenses
- Click on Verify and Complete
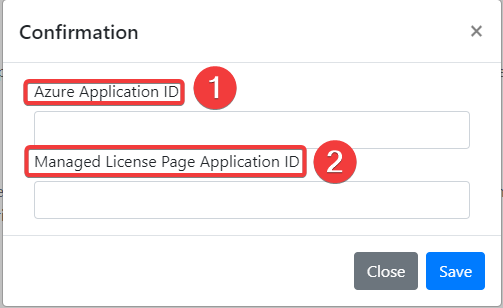
- You will see a popup asking for the previously created Application IDs. Once you fill in this information click on the 'Save' button
- Enter the Self-Service Portal Azure AD Login in field 1 Portal Azure AD Login
- Enter the Self-Service Portal Azure AD Manage Licenses in field 2 Portal Azure AD Manage Licenses
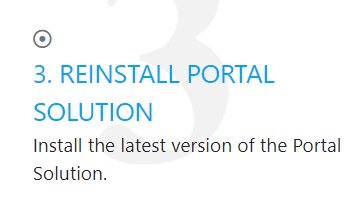
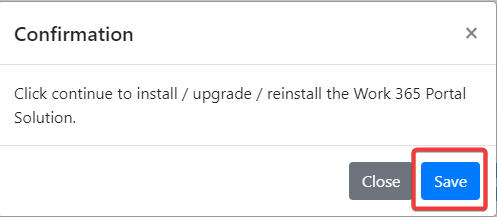
- You will be back to the previous screen, click on 3. Install/Reinstall Portal Solution
- From the dropdown, select the correct Self-Service Portal name, and make sure to leave the 'Initialize Portal' option ON.

- You will see a confirmation popup, click on the 'Save' button
- Wait a few minutes until the popup confirms this process is completed.
Your Self-Service Portal Setup has been completed
Updated about 2 years ago
Did this page help you?