
Provisioning an Account from Work 365
How to Provision an Account including a new Tenant in Work 365
After a sale has just been made a new account needs to be created, a Microsoft Customer Agreement needs to be sent to the customer for them to sign, a new billing contract needs to be created and subscriptions added.
- Create an Account if it doesn't already exist. For existing Account Record:
- Click on Work 365 ➤ Provision Account and a new popup window will open

- Select the Provider from the pop-up window, for this we will be looking at Microsoft Partner Center:
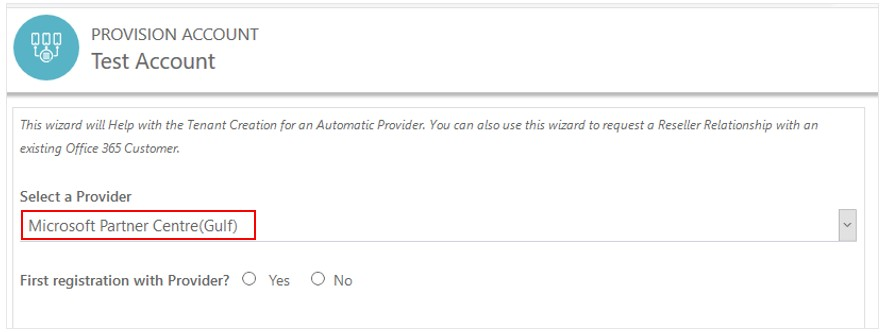
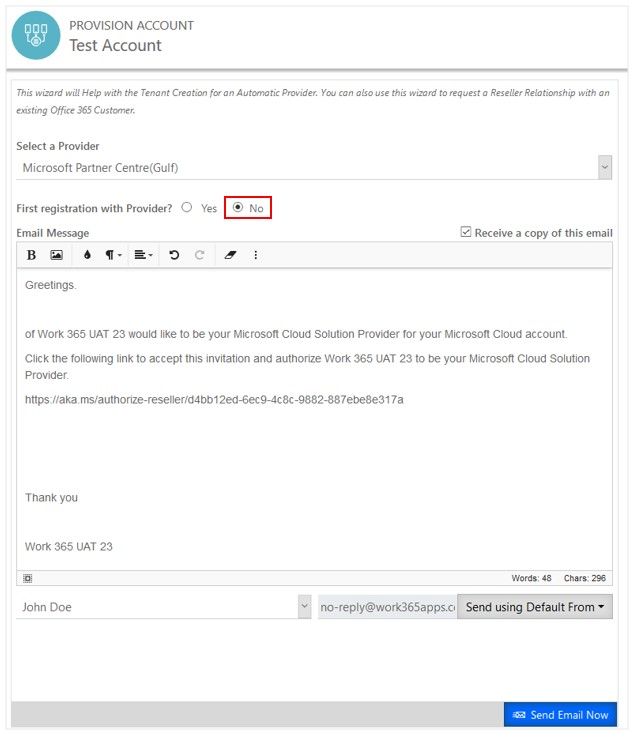
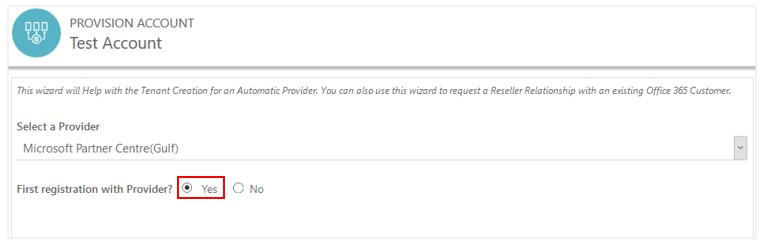
- Answer Yes or No for “First registration with Provider?”
No means that the customer already uses Office 365 and has a relationship with Microsoft, but now the customer wants the relationship with you as their Reseller so you would need to send the Microsoft Customer Agreement. The email that is sent with the link to establish the reseller relationship. After selecting no, the email template for the Microsoft Customer Agreement is populated with your name and company name. From the drop-down select the contact for the agreement to be sent. Send Email Now. Close the window.
In this example, the email is sent to John Doe with the link that will authorize this organization as the Cloud partner for Test Account.
- Yes means that the customer is not currently using Office 365 OR they you need to provision a new tenant with Microsoft Partner Center for the Account.
- Fill in the company details on the customer. Select Verify Address.
- For the Country: you can only provision in the countries you are authorized to by your provider.
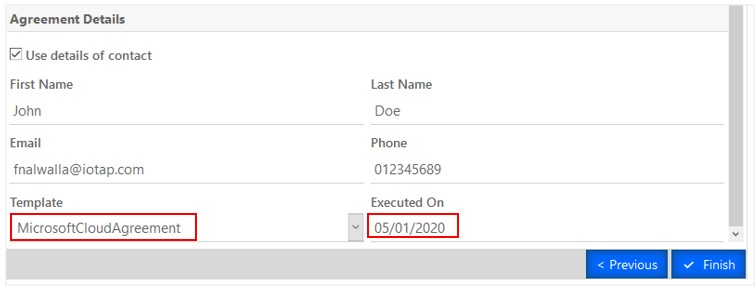
The customer contact information will populate automatically. - Fill in the Agreement Details
- Select the template that you want to send to the customer. The Microsoft Cloud Agreement is already set up for you, but if you have your own agreements that you would like to add, you can do so by adding an agreement template to Work 365 ➤ Agreement Templates (under Provider Management).
- Select the date on which the agreement was signed. Finish.
- Hit finish and this will save the details and the next screen will provide the information for the Customer
- Create a billing contract for the customer.
- Add the subscriptions to the billing contract.
Updated over 2 years ago
Did this page help you?