Install Solution
This article provides the steps to install and configure the Work 365 Self-Service Portal solution using the Onboarding App
Pre-requisites
Performing this setup will require the following:
- Work 365 Core App previously Installed
- User with System Admin privileges on tenant
Time required
This setup process is expected to take 45 minutes
Additional Notes
This article will cover the setup from Work 365 Manually.
Procedure
Make sure to select the appropriate solution for your Data Center:
US: Power Pages Portal EU: Power Pages Portal
-
Access to https://make.powerapps.com
-
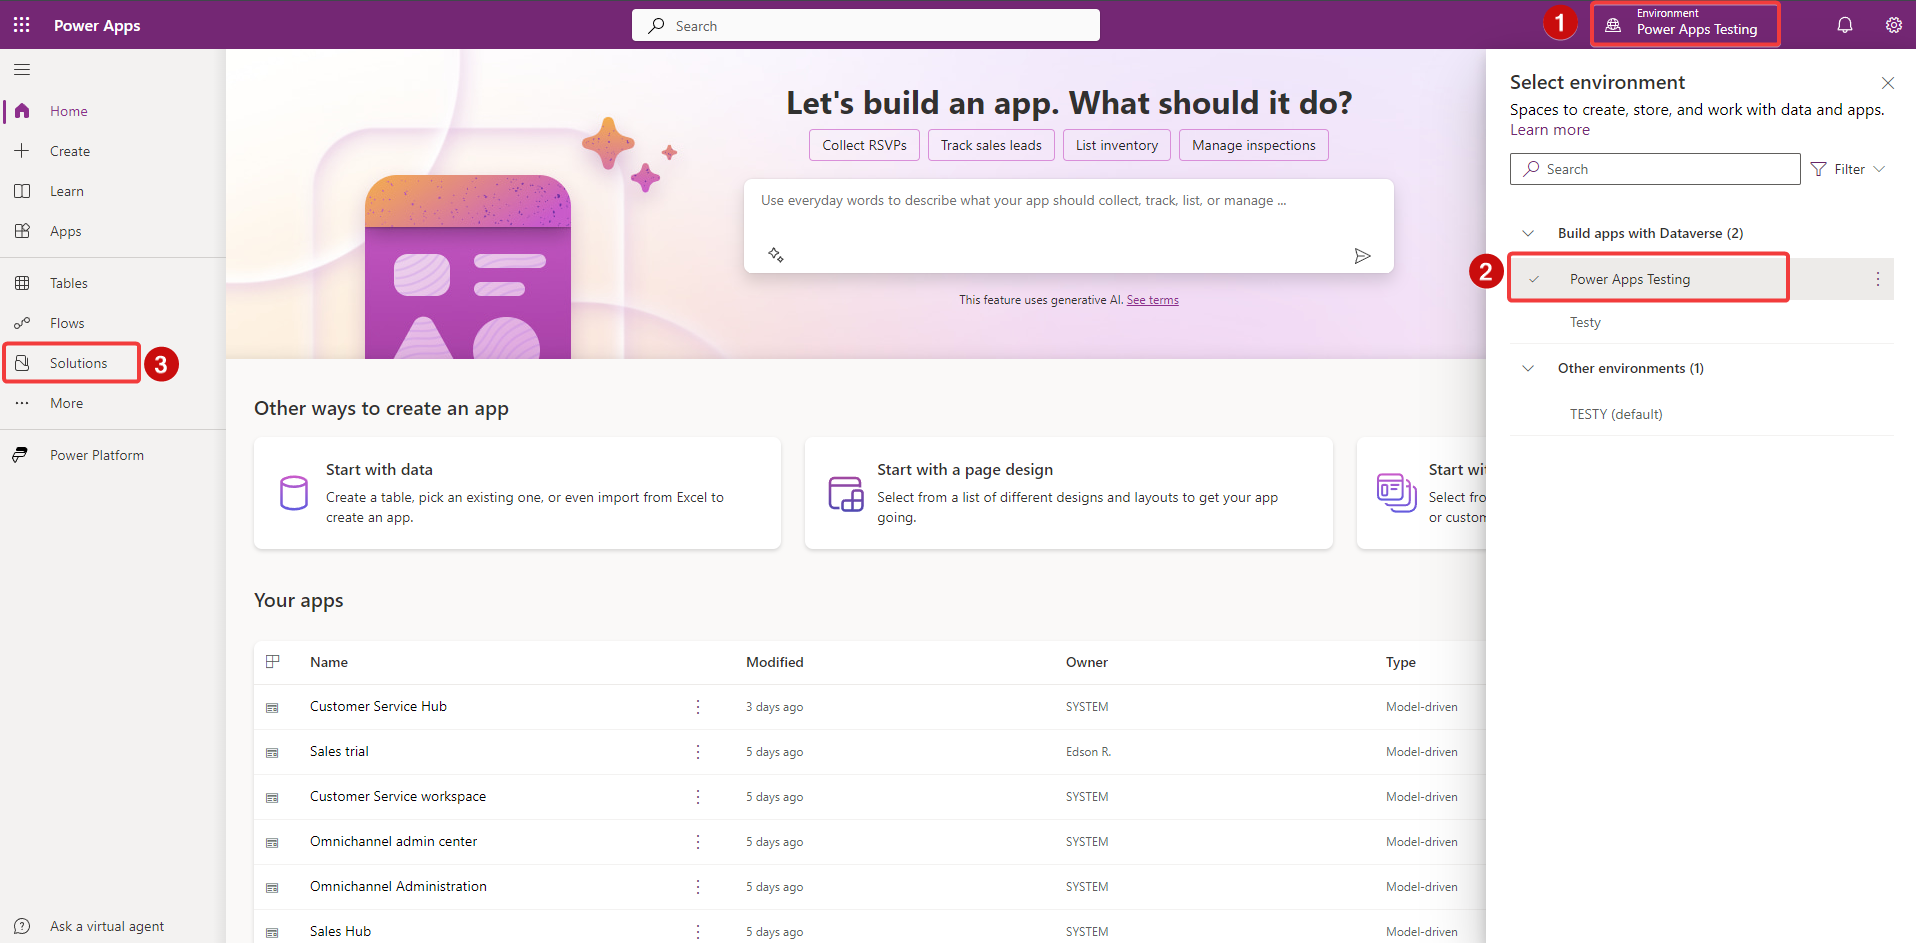
Select your environment
-
Click on 'Solutions'
-
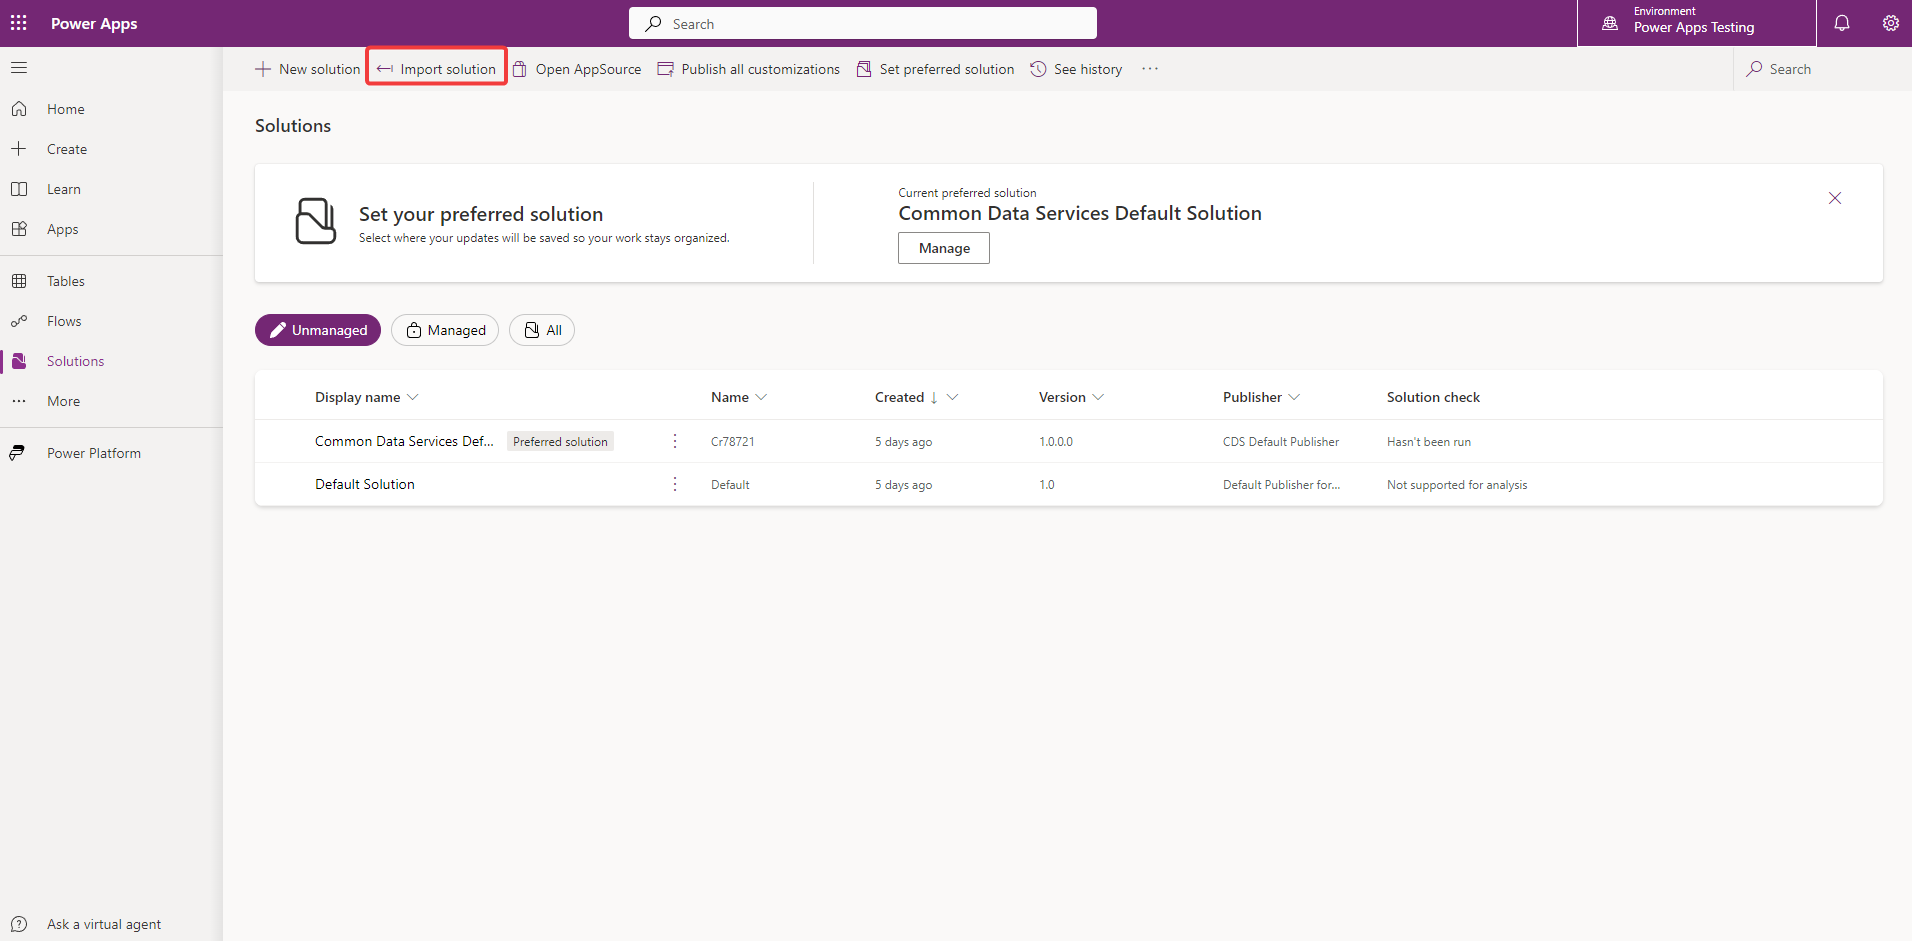
Click on Import Solution button
-
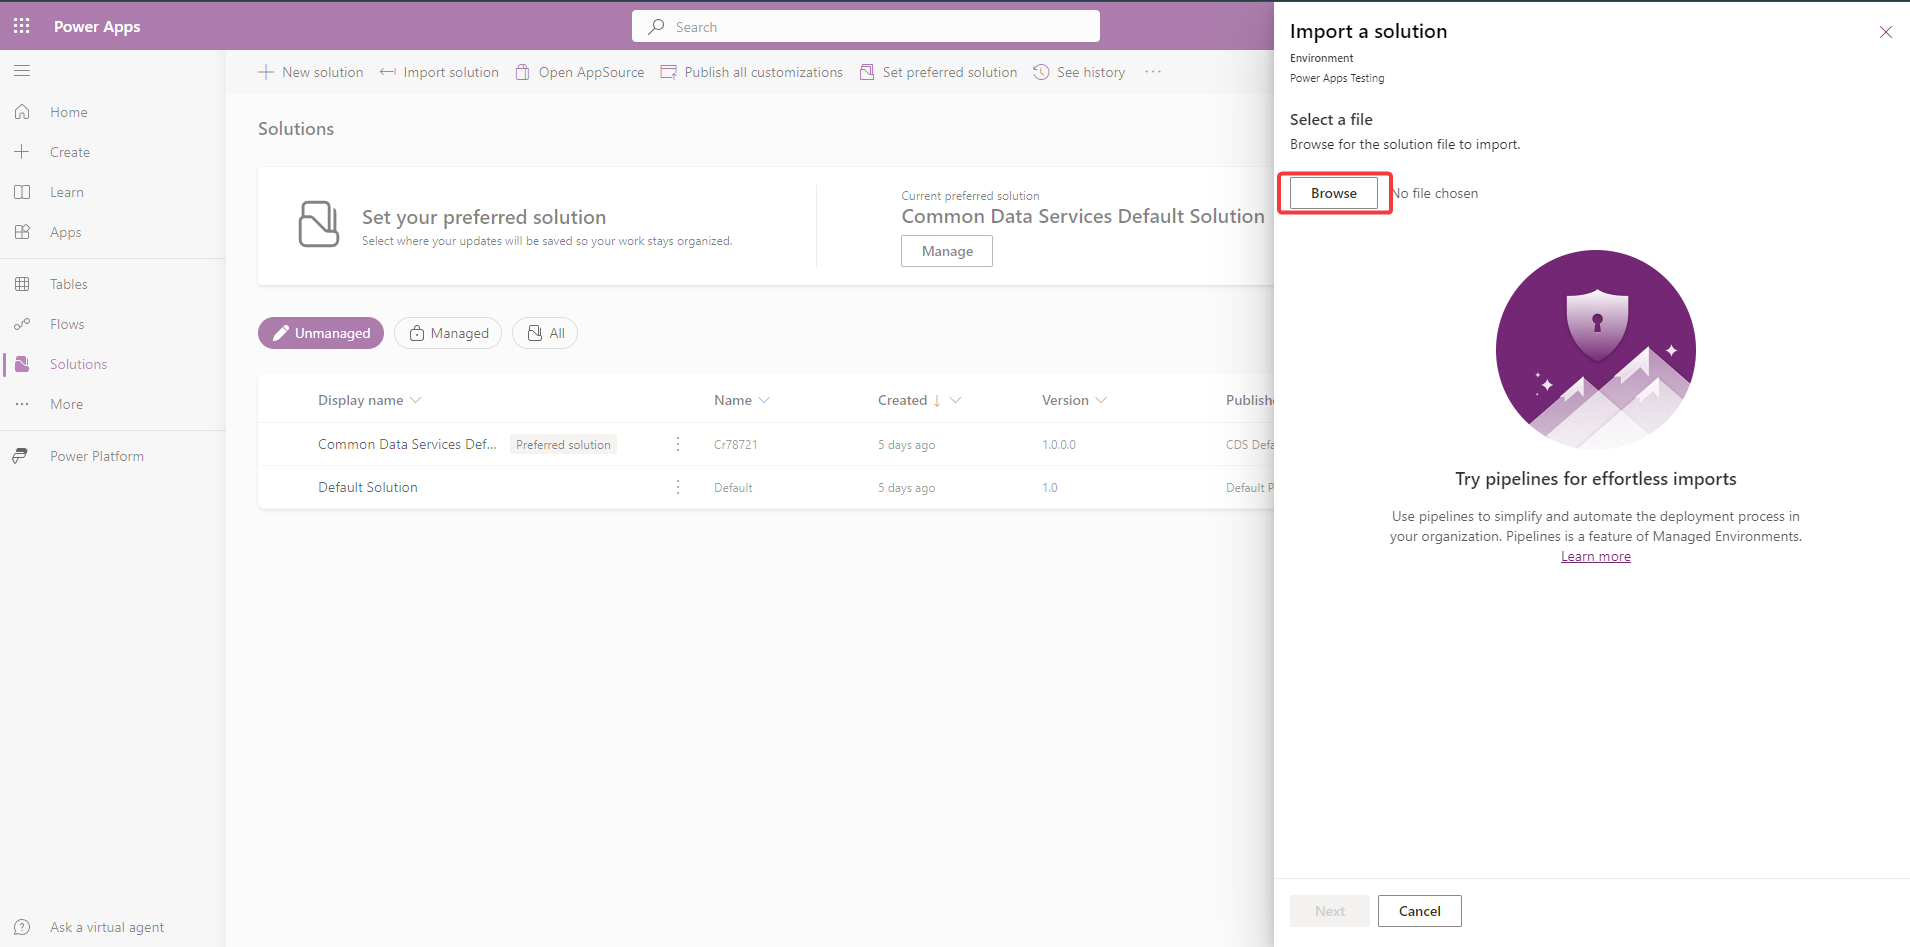
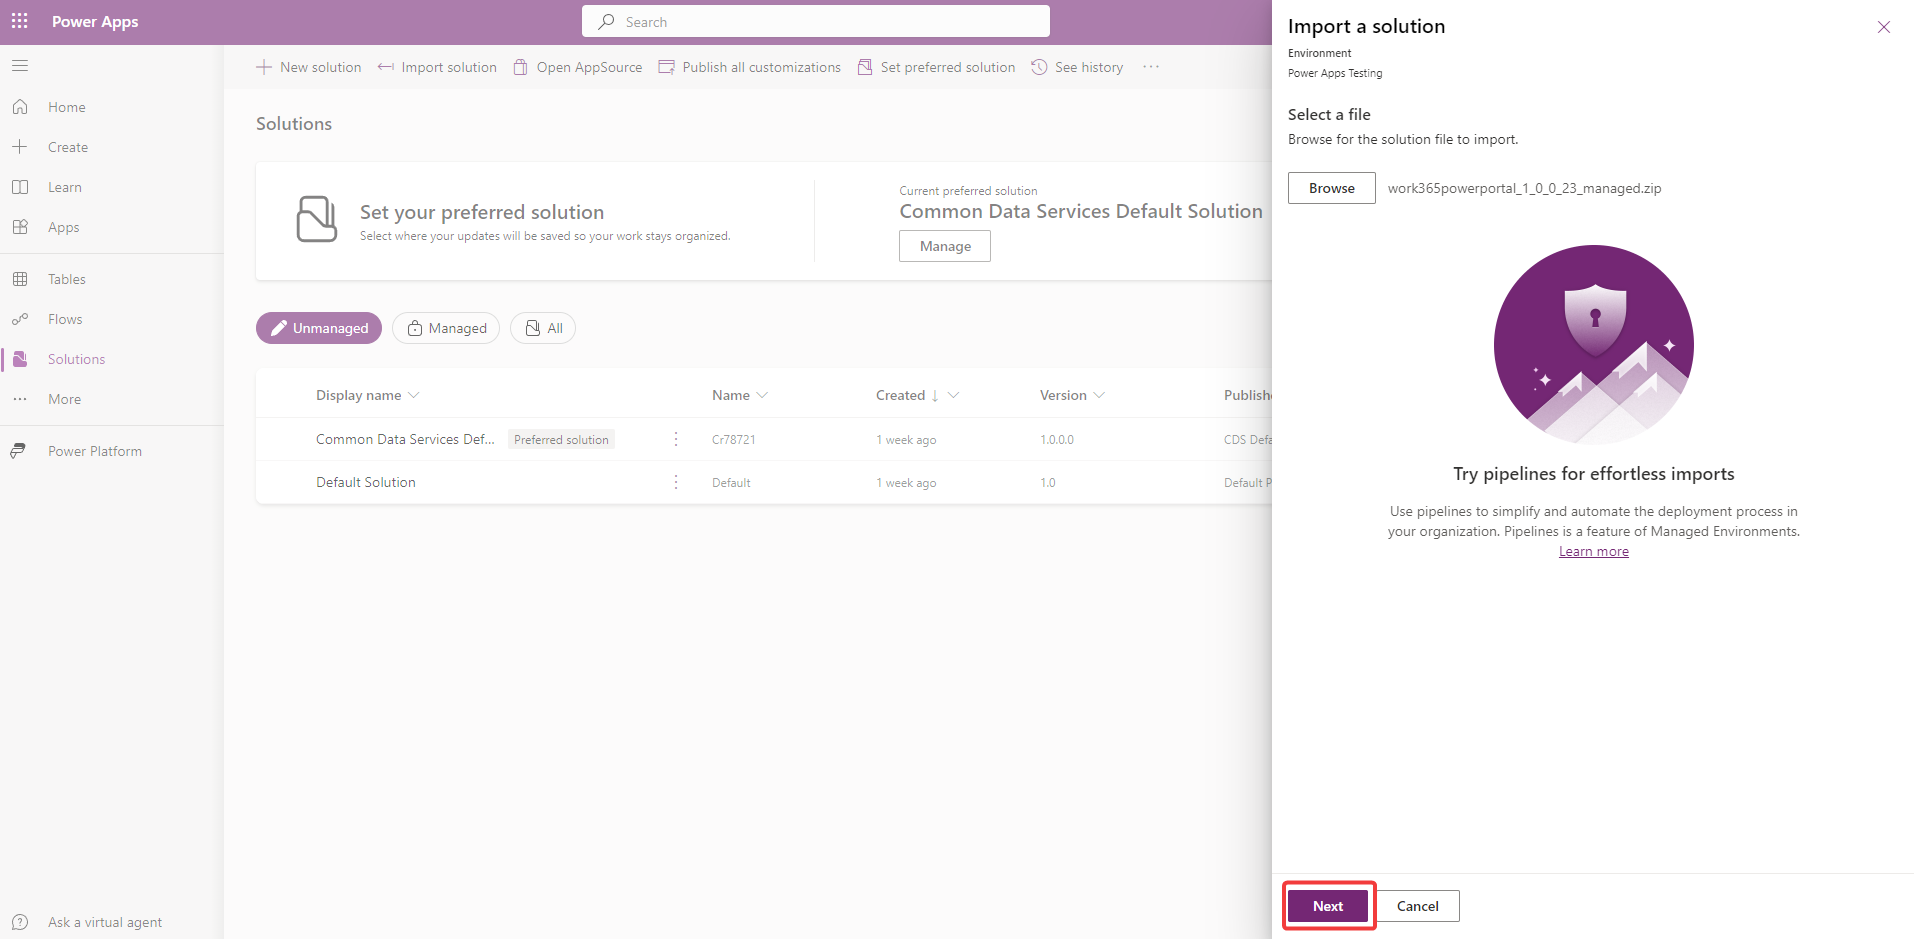
Click on 'Browse' on the popup window
-
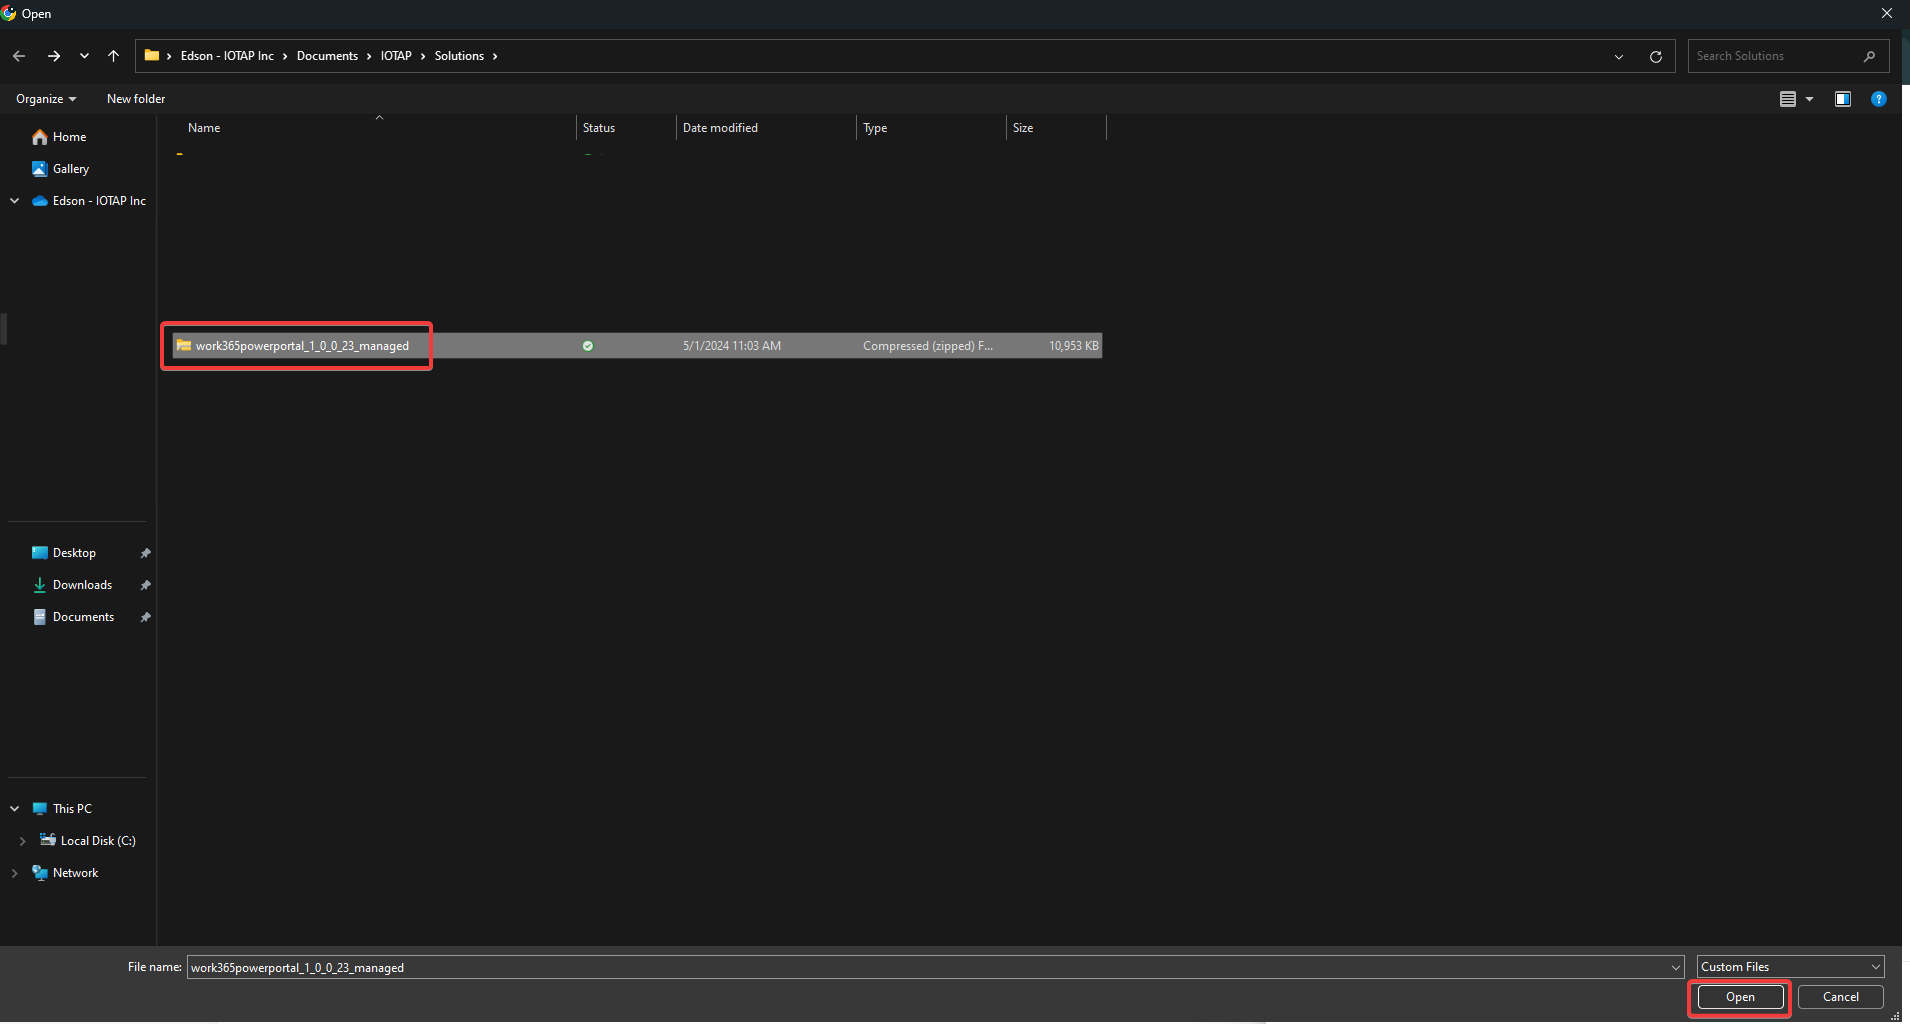
Look for the previously downloaded file and click 'Open'
-
Click on Next
-
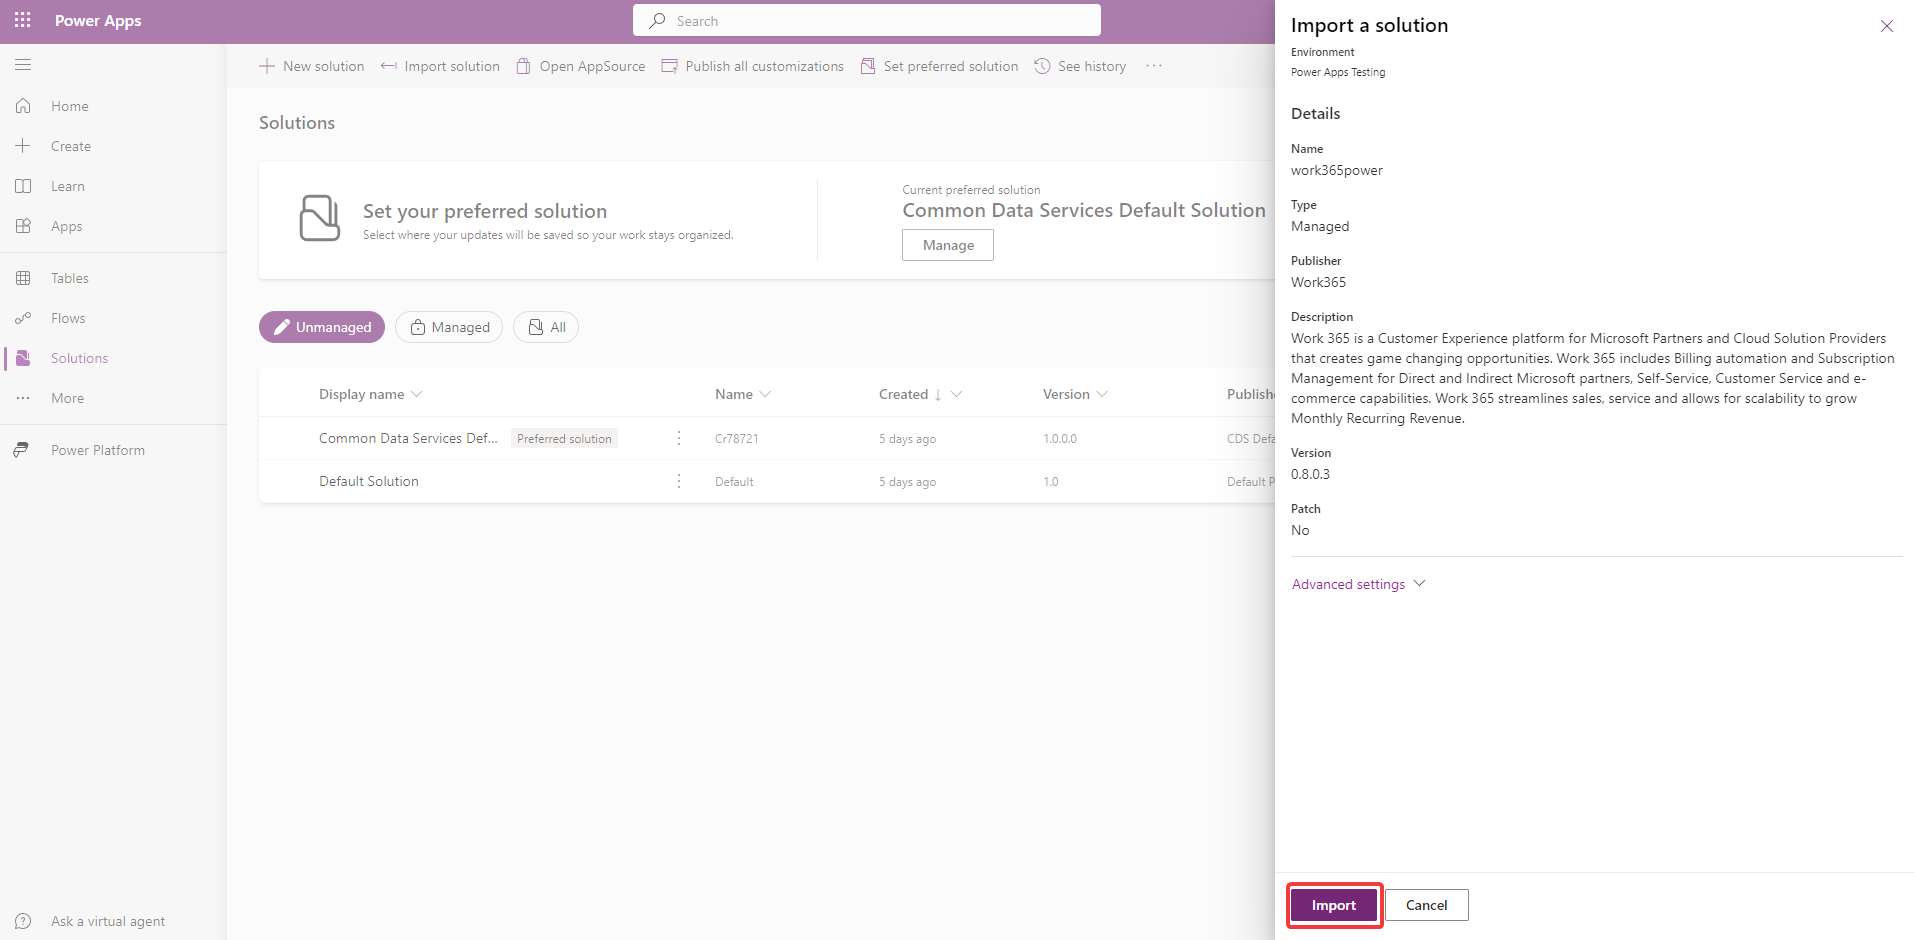
Click Import
-
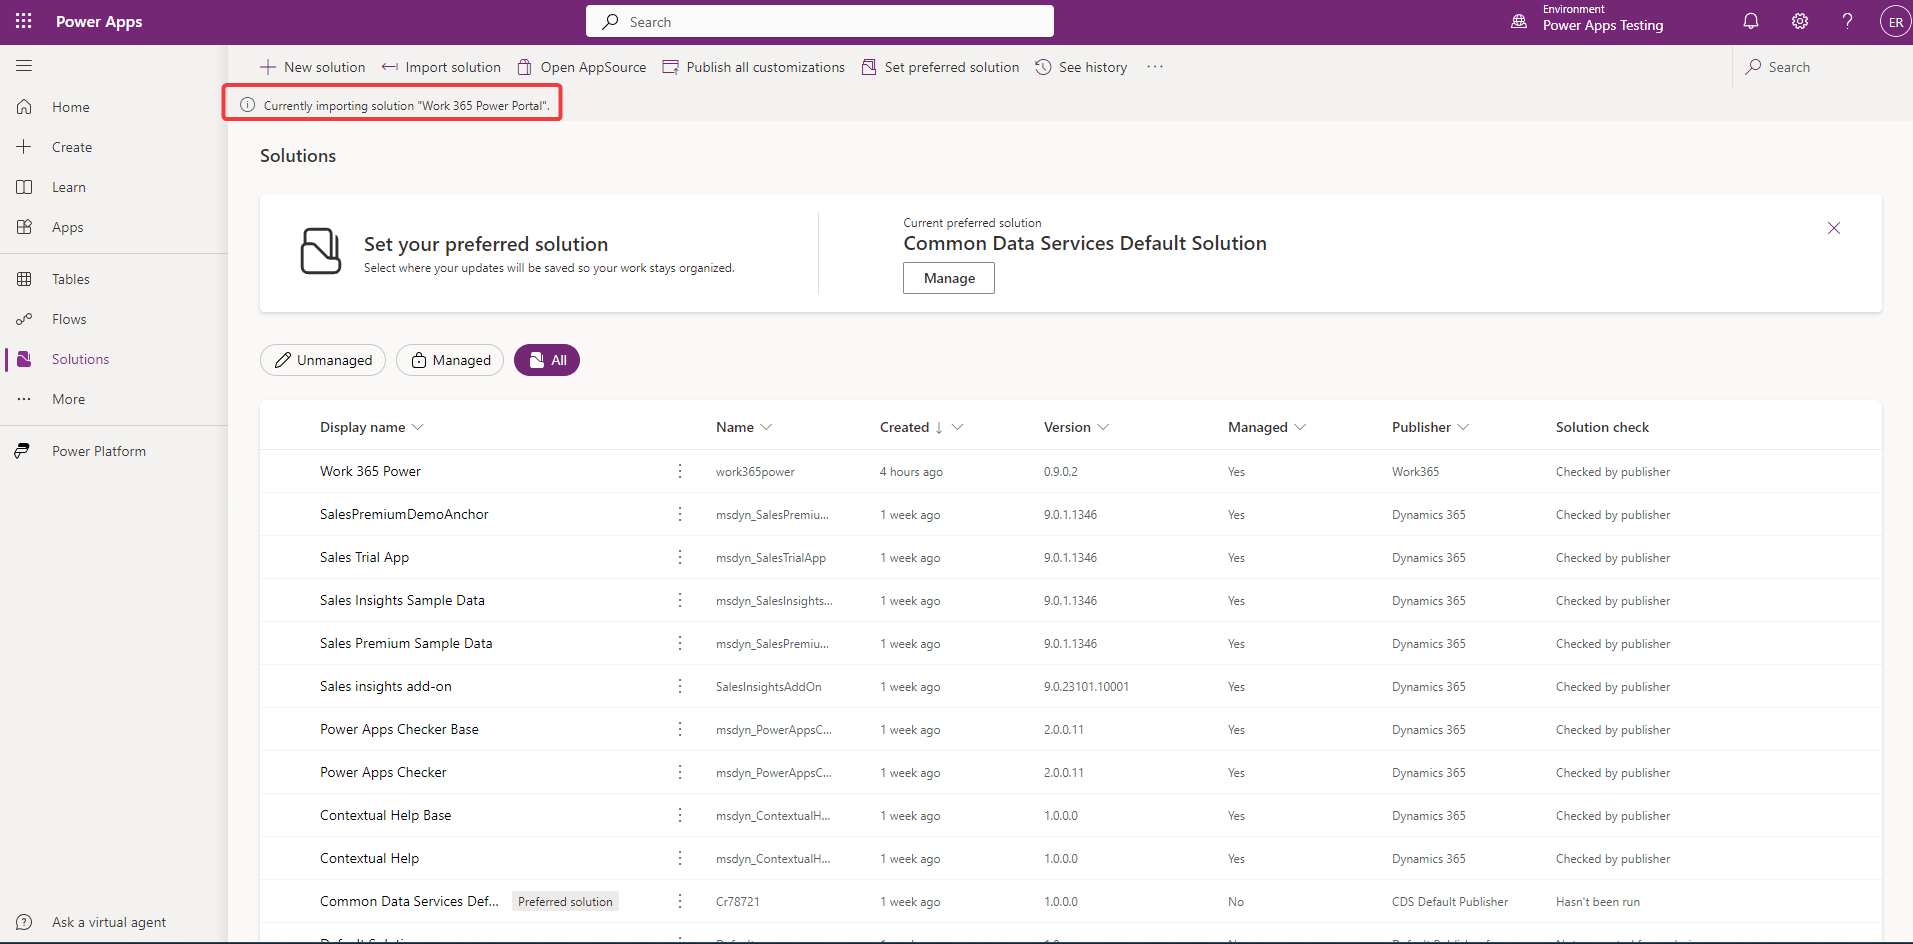
Wait for the Import process to finish (This process can take up to 2 hours)
-
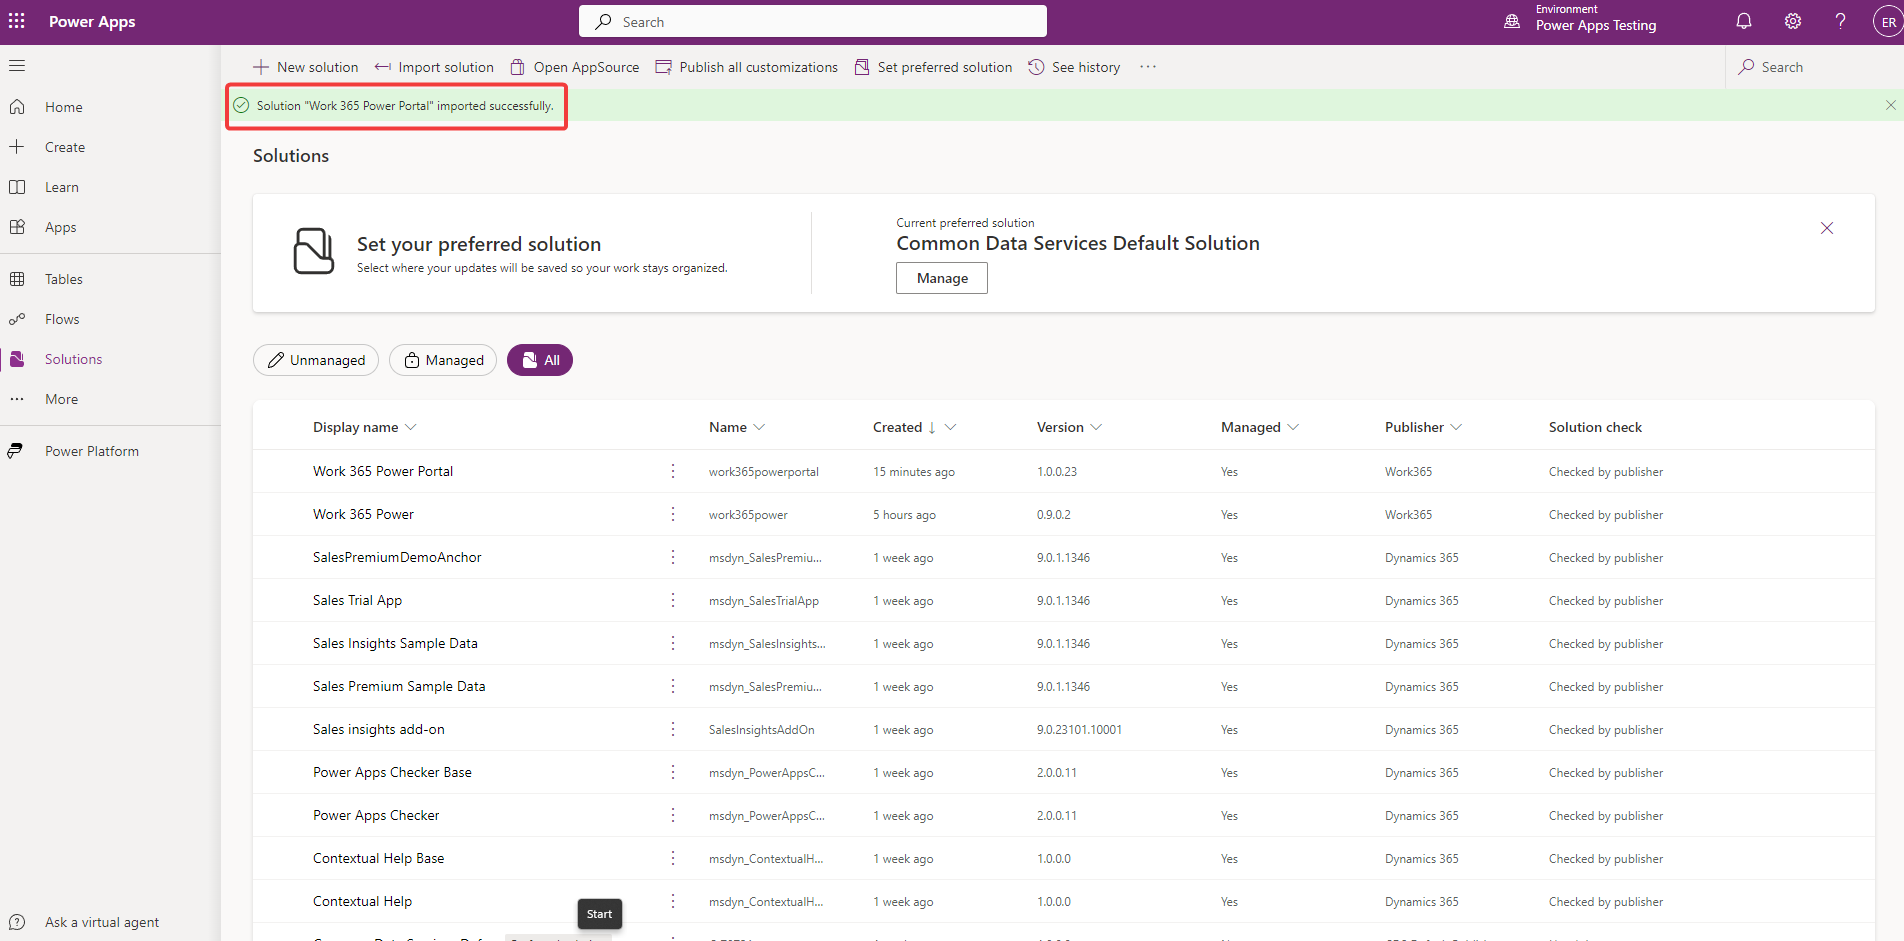
Wait for the confirmation message
-
Acess to https://make.powerpages.microsoft.com and click on 'Inactive Sites'
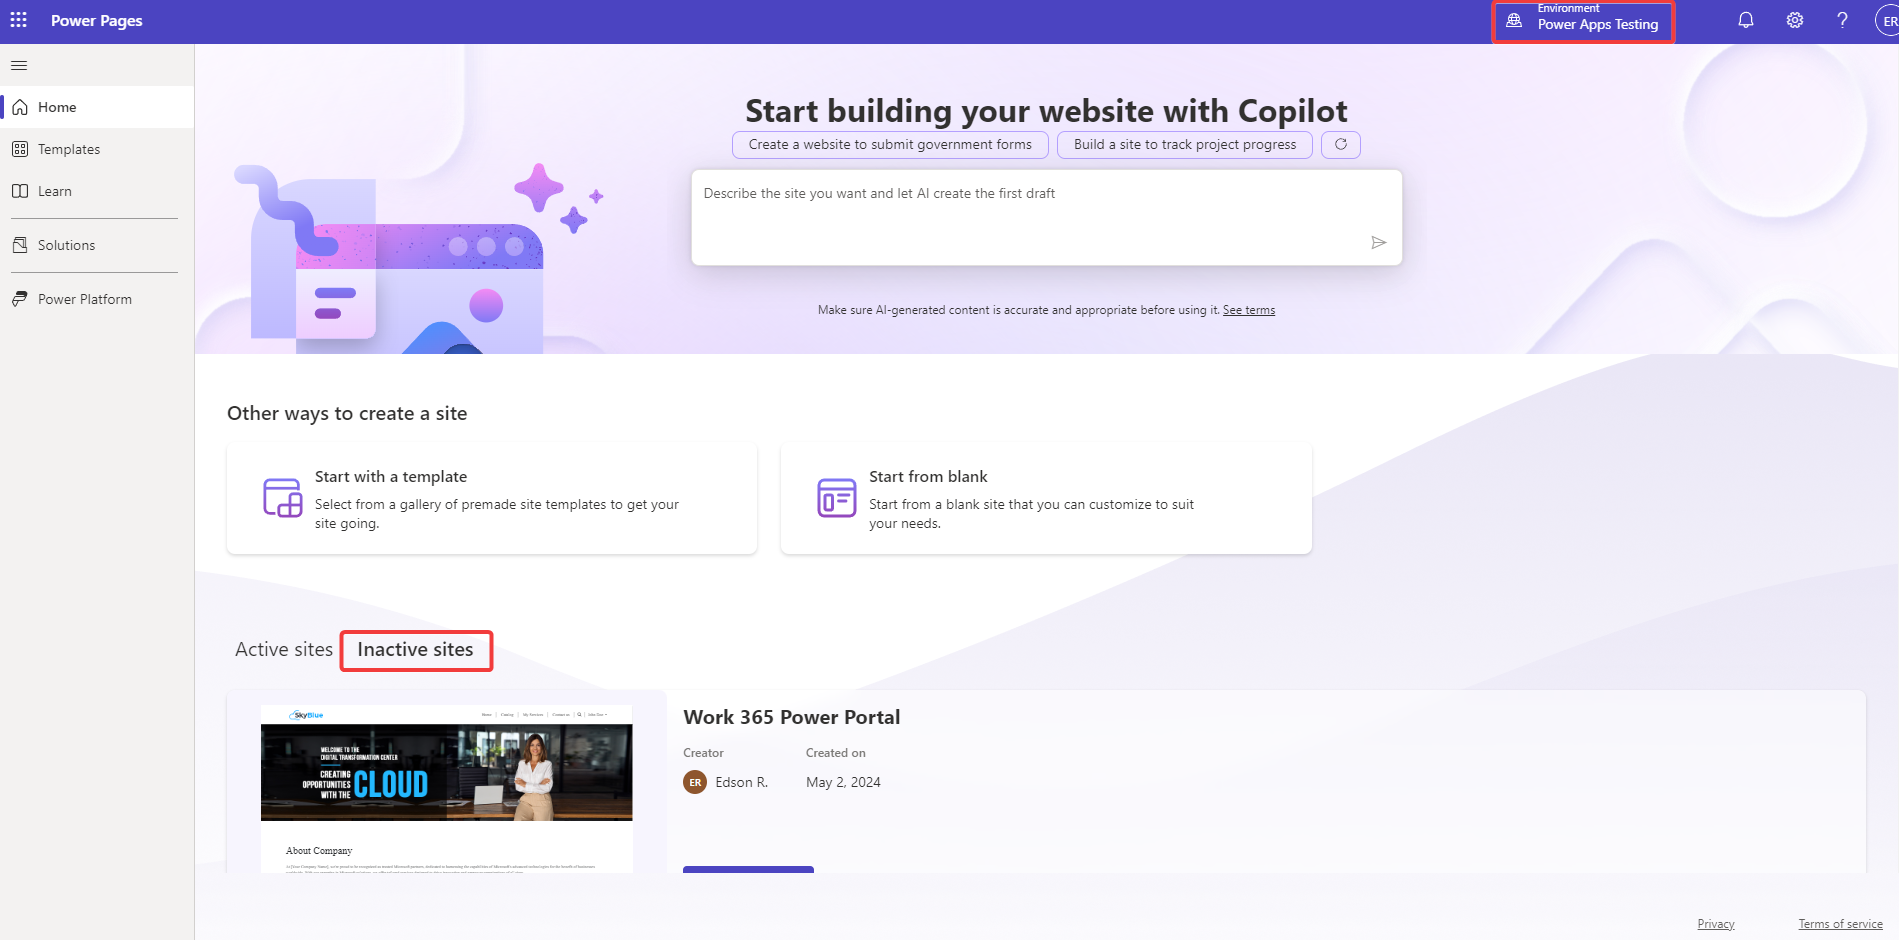
-
Click on 'Reactivate' (Make sure to Reactivate the Work 365 Power Portal)
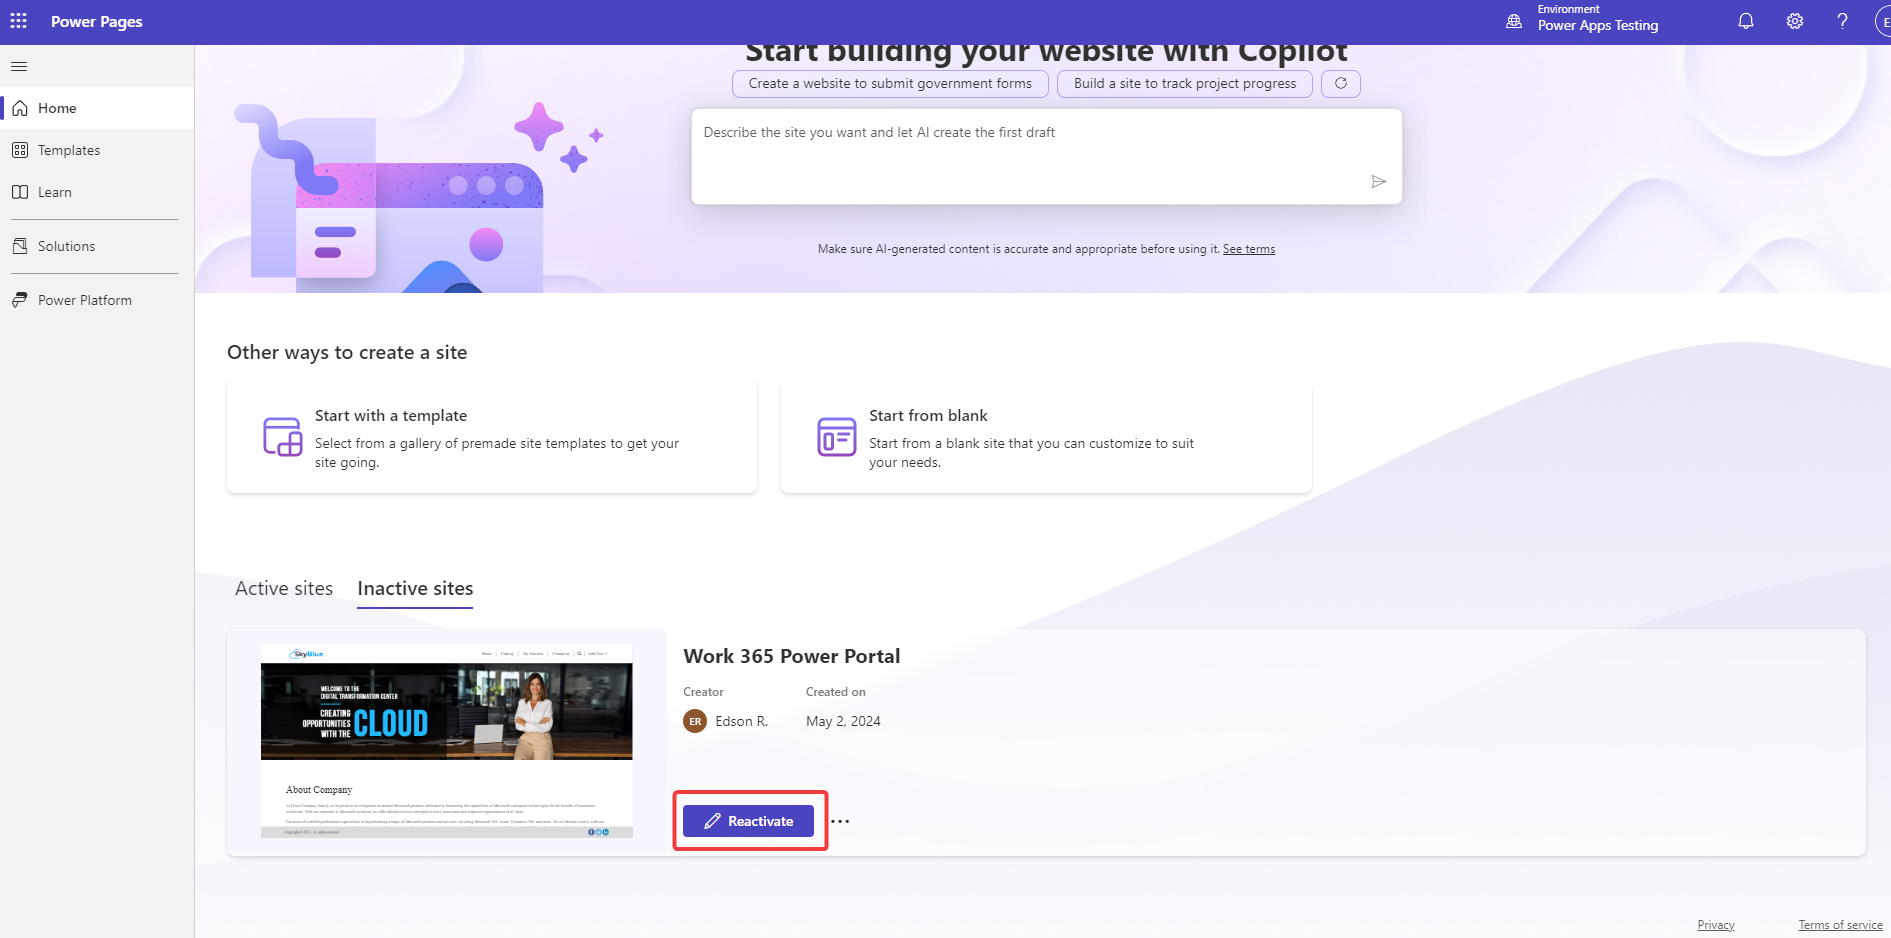
-
Name the Website (We recommend to use less than 10 characters), create a Website address (This would be replaced if you choose to use a Custom Domain instead) and click on 'Done'
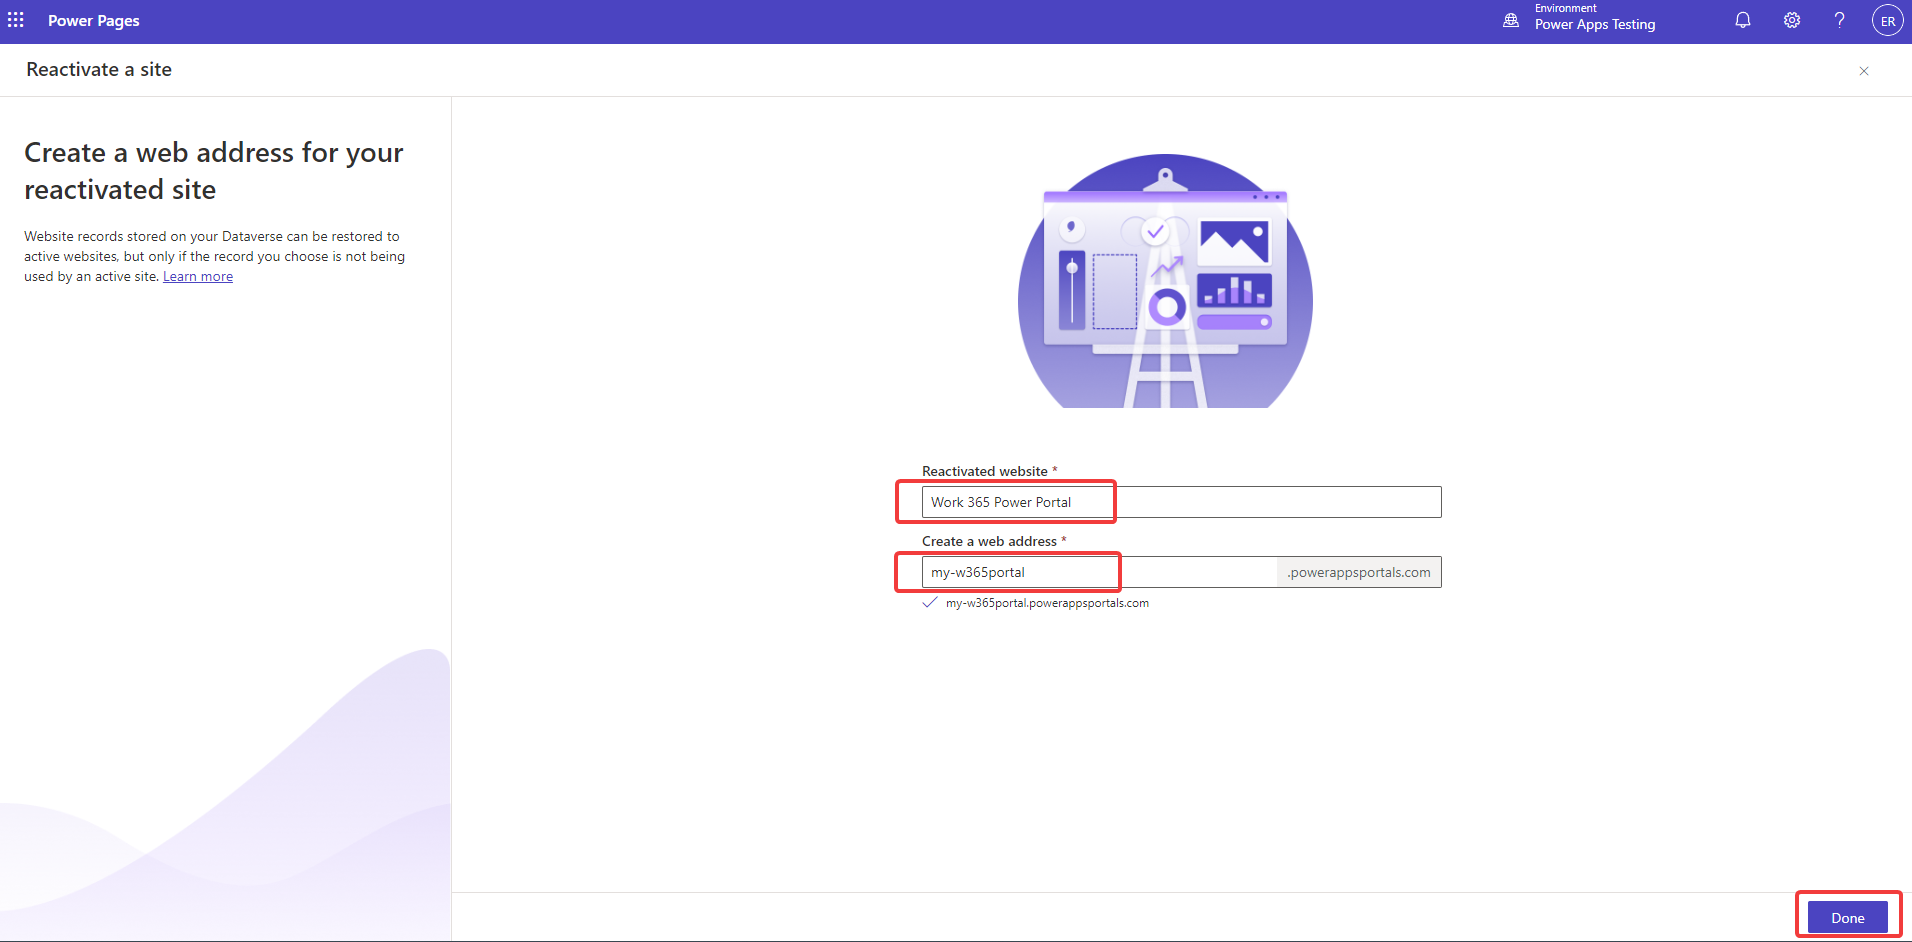
-
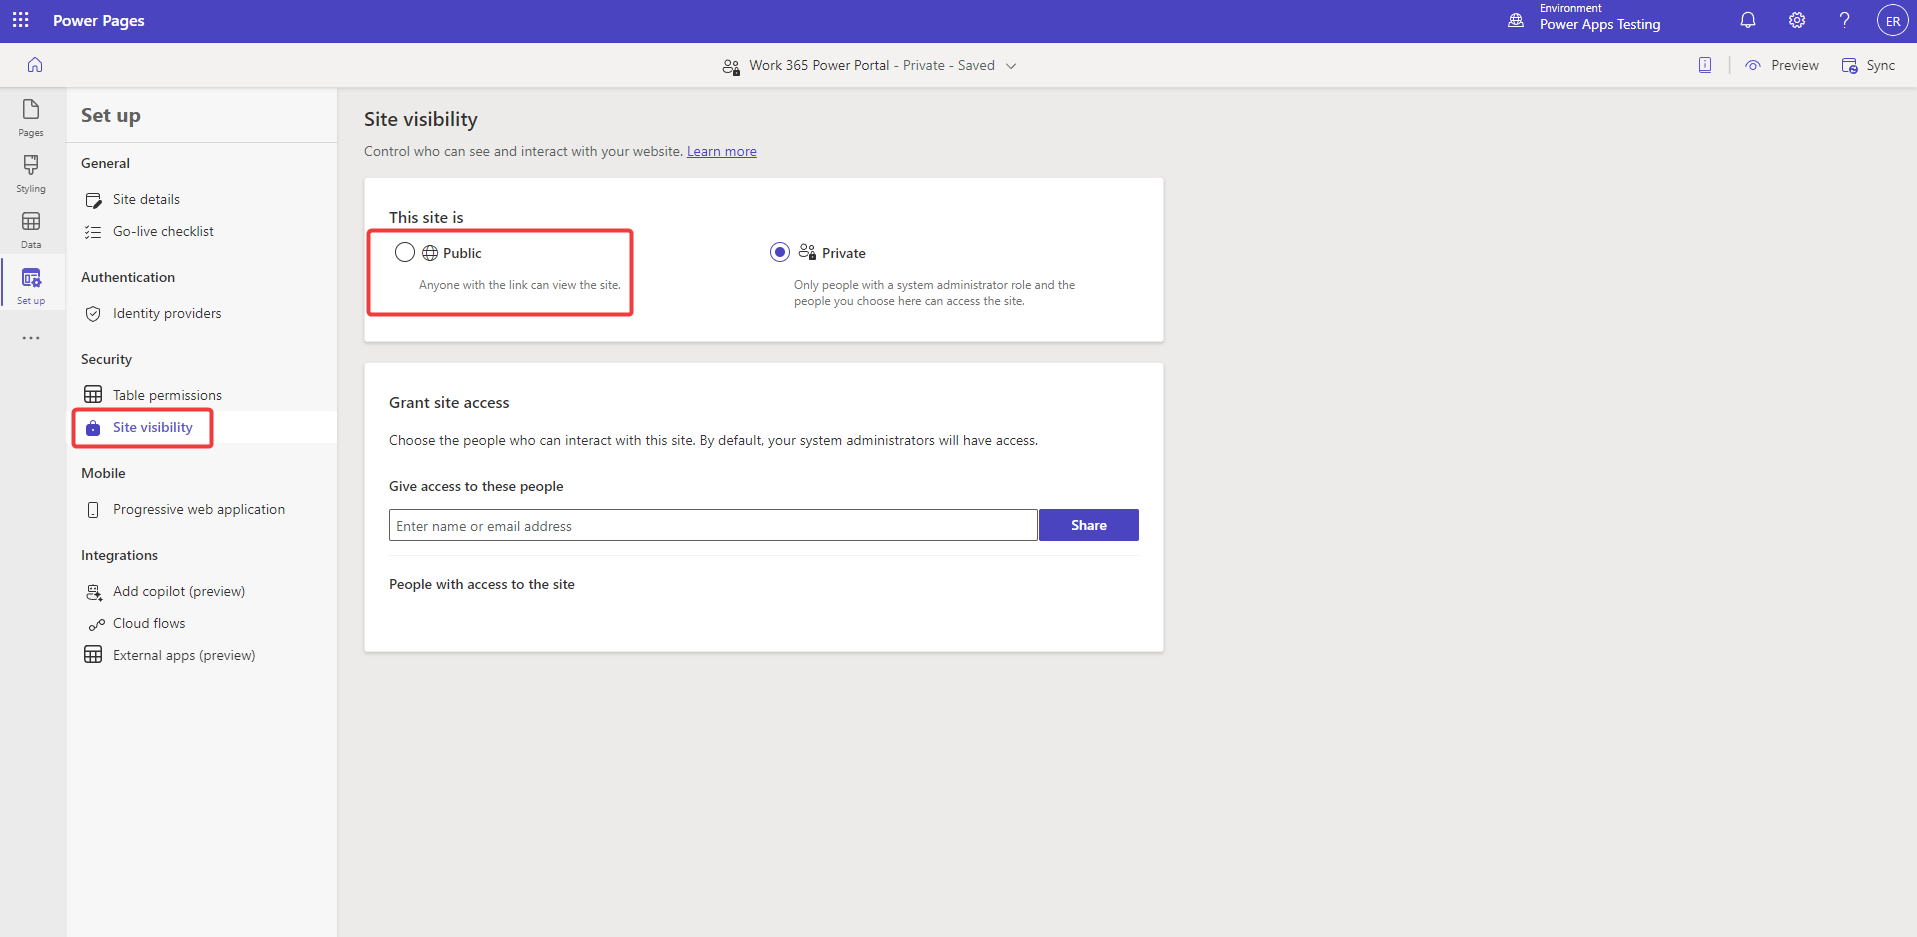
Click on the 'Set up' icon located on the left
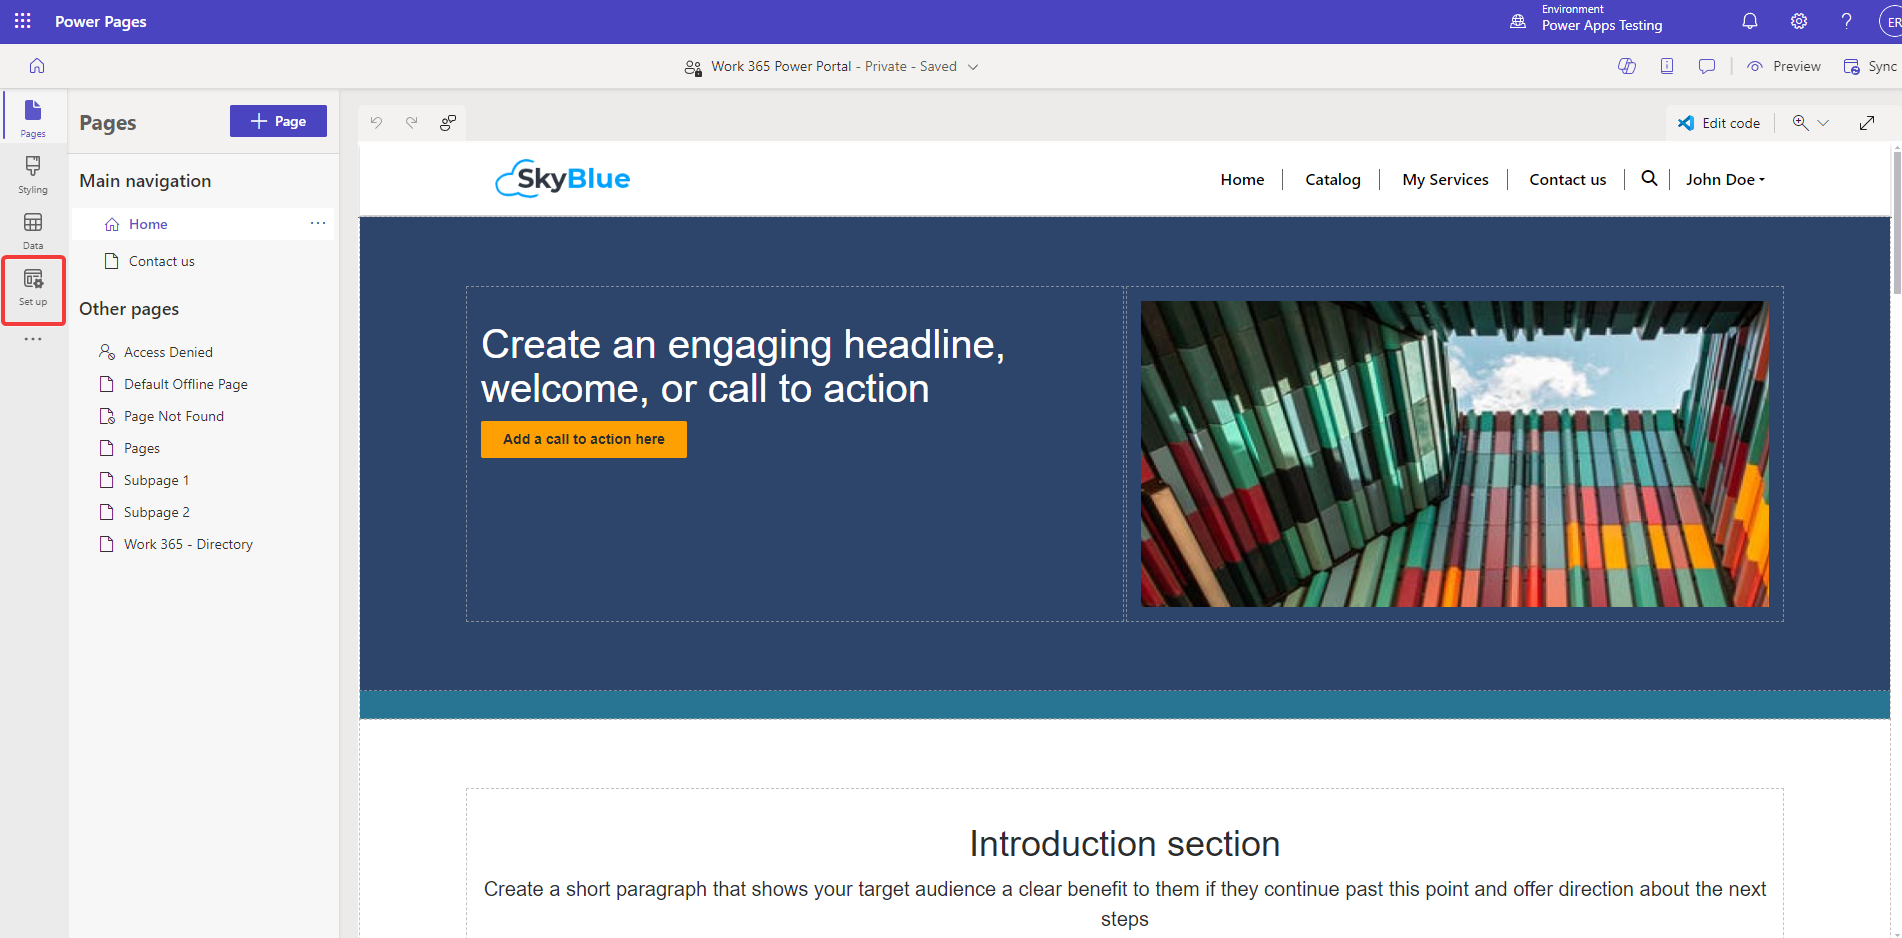
-
Click on 'Site visibility' and click on 'Public'
-
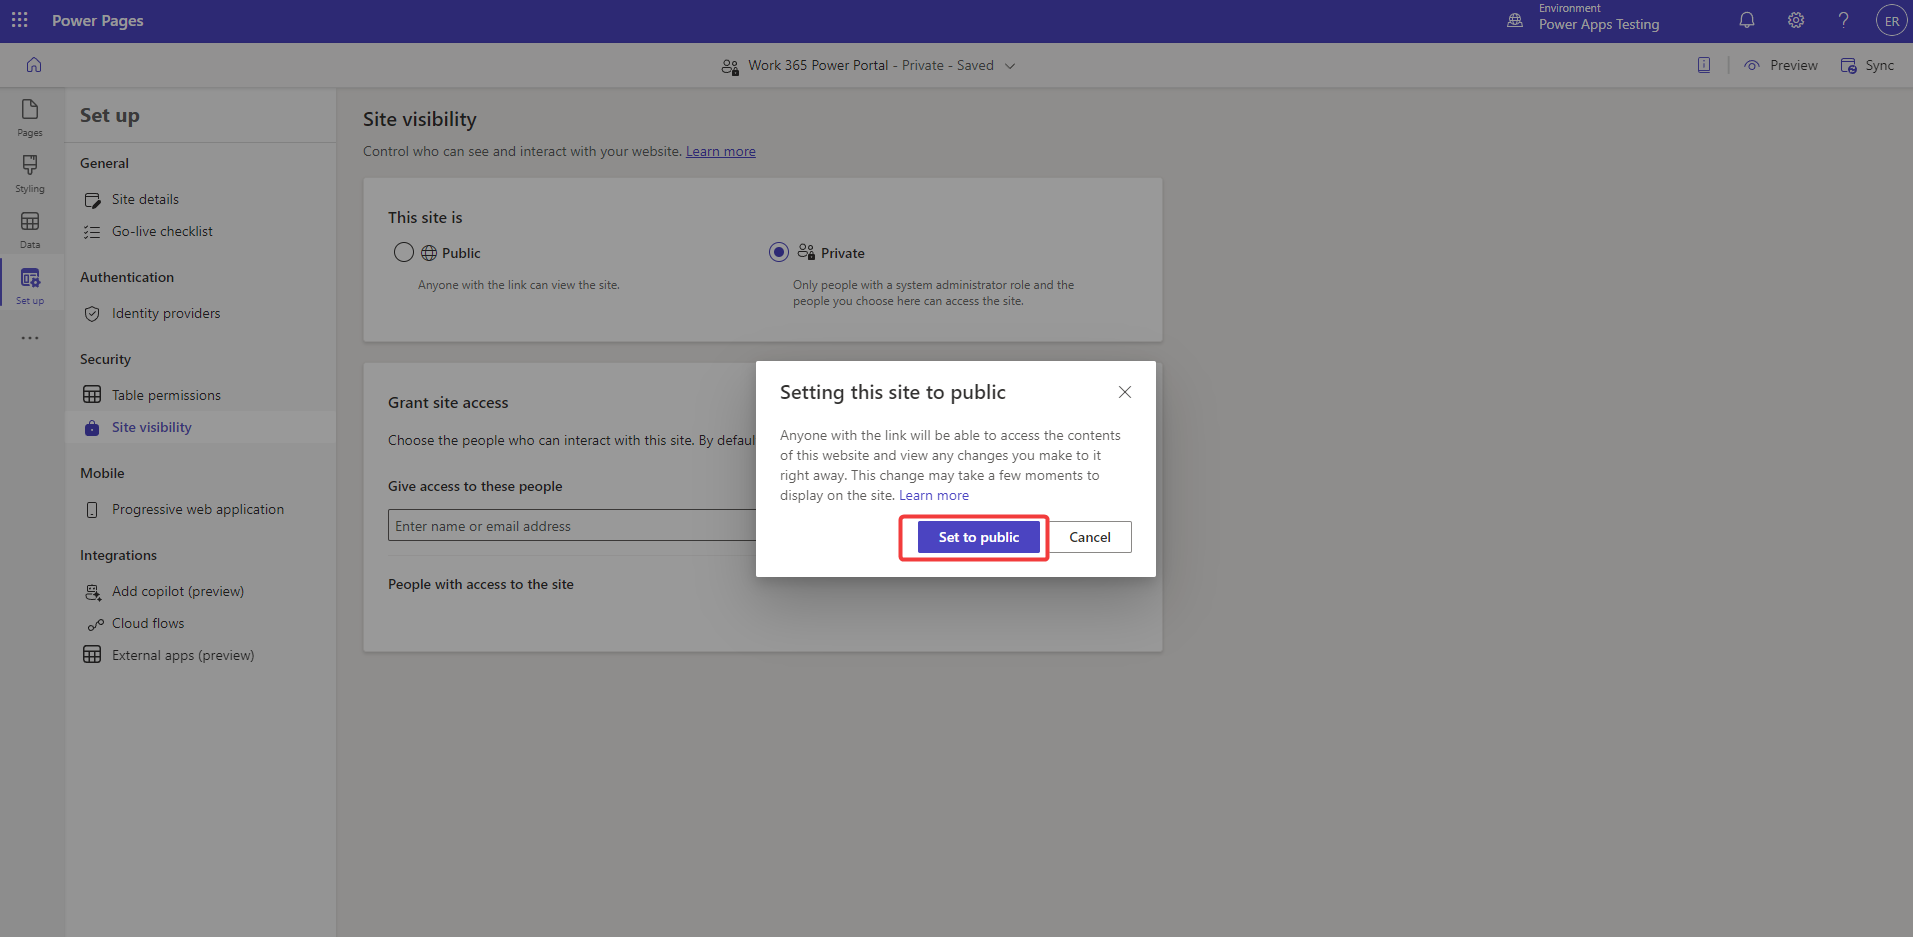
Click on 'Set Public'
-
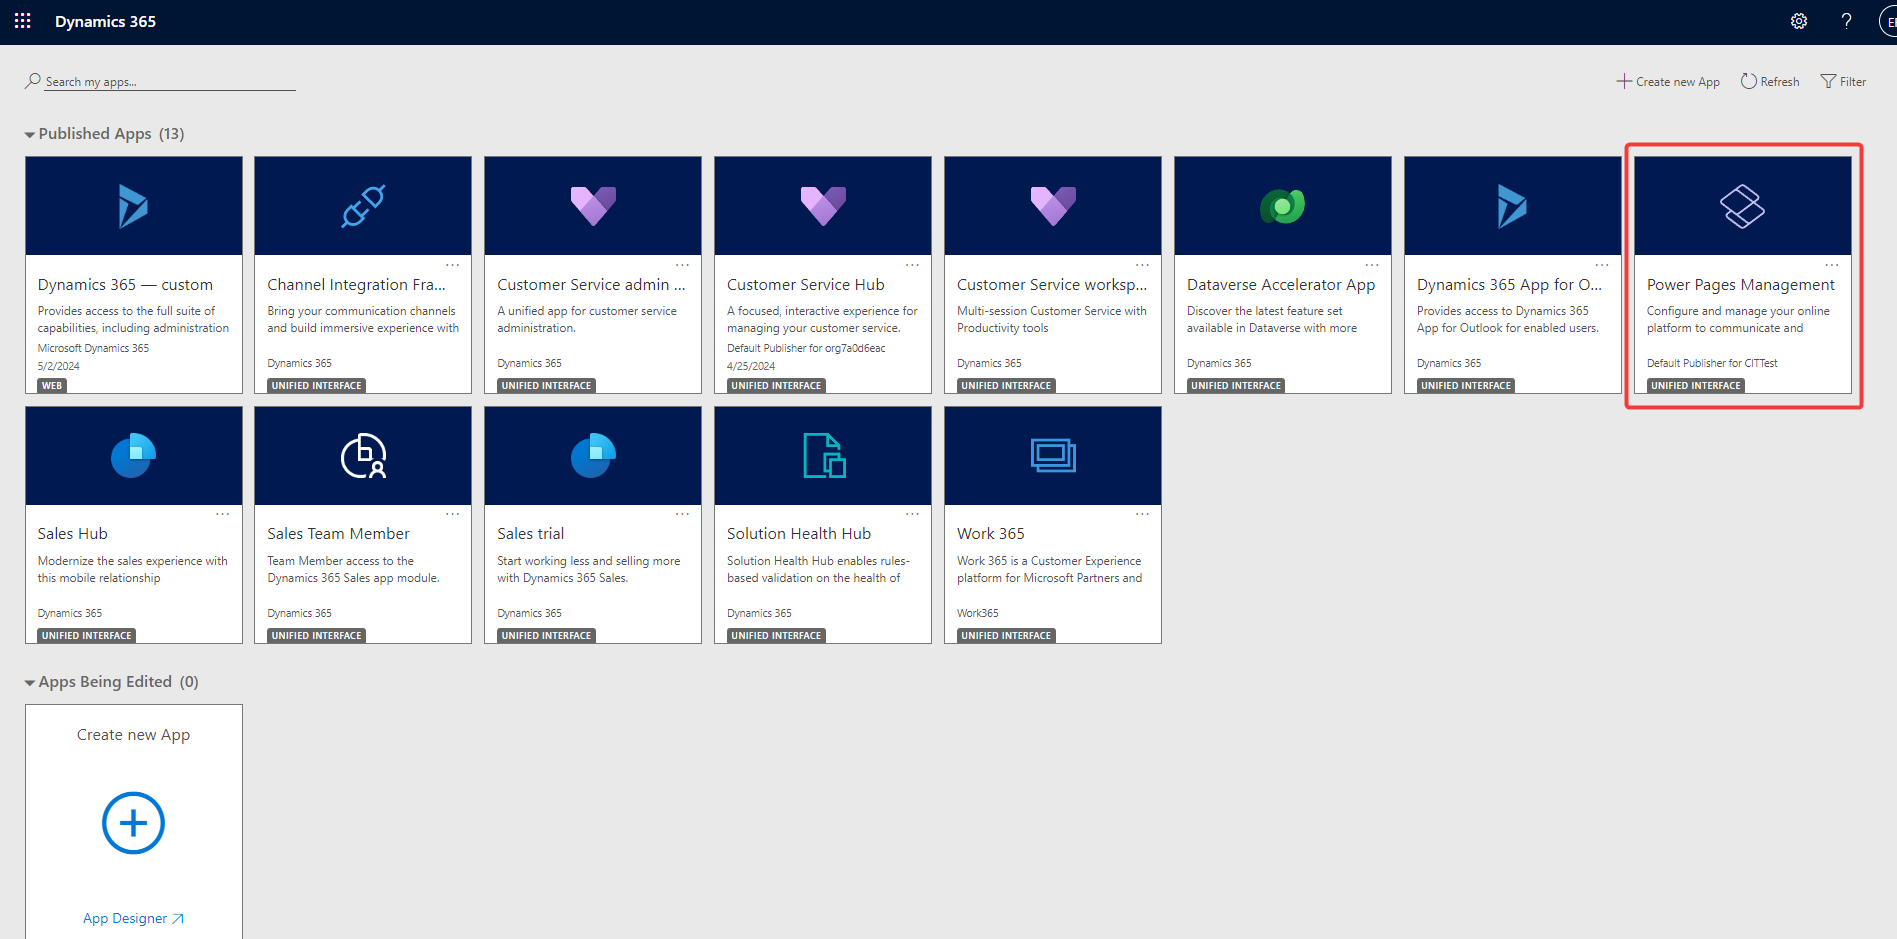
Go back to your CRM and click on the 'App' beside Dynamics 365 at the top-left corner

-
Click on 'Power Pages Management'
-
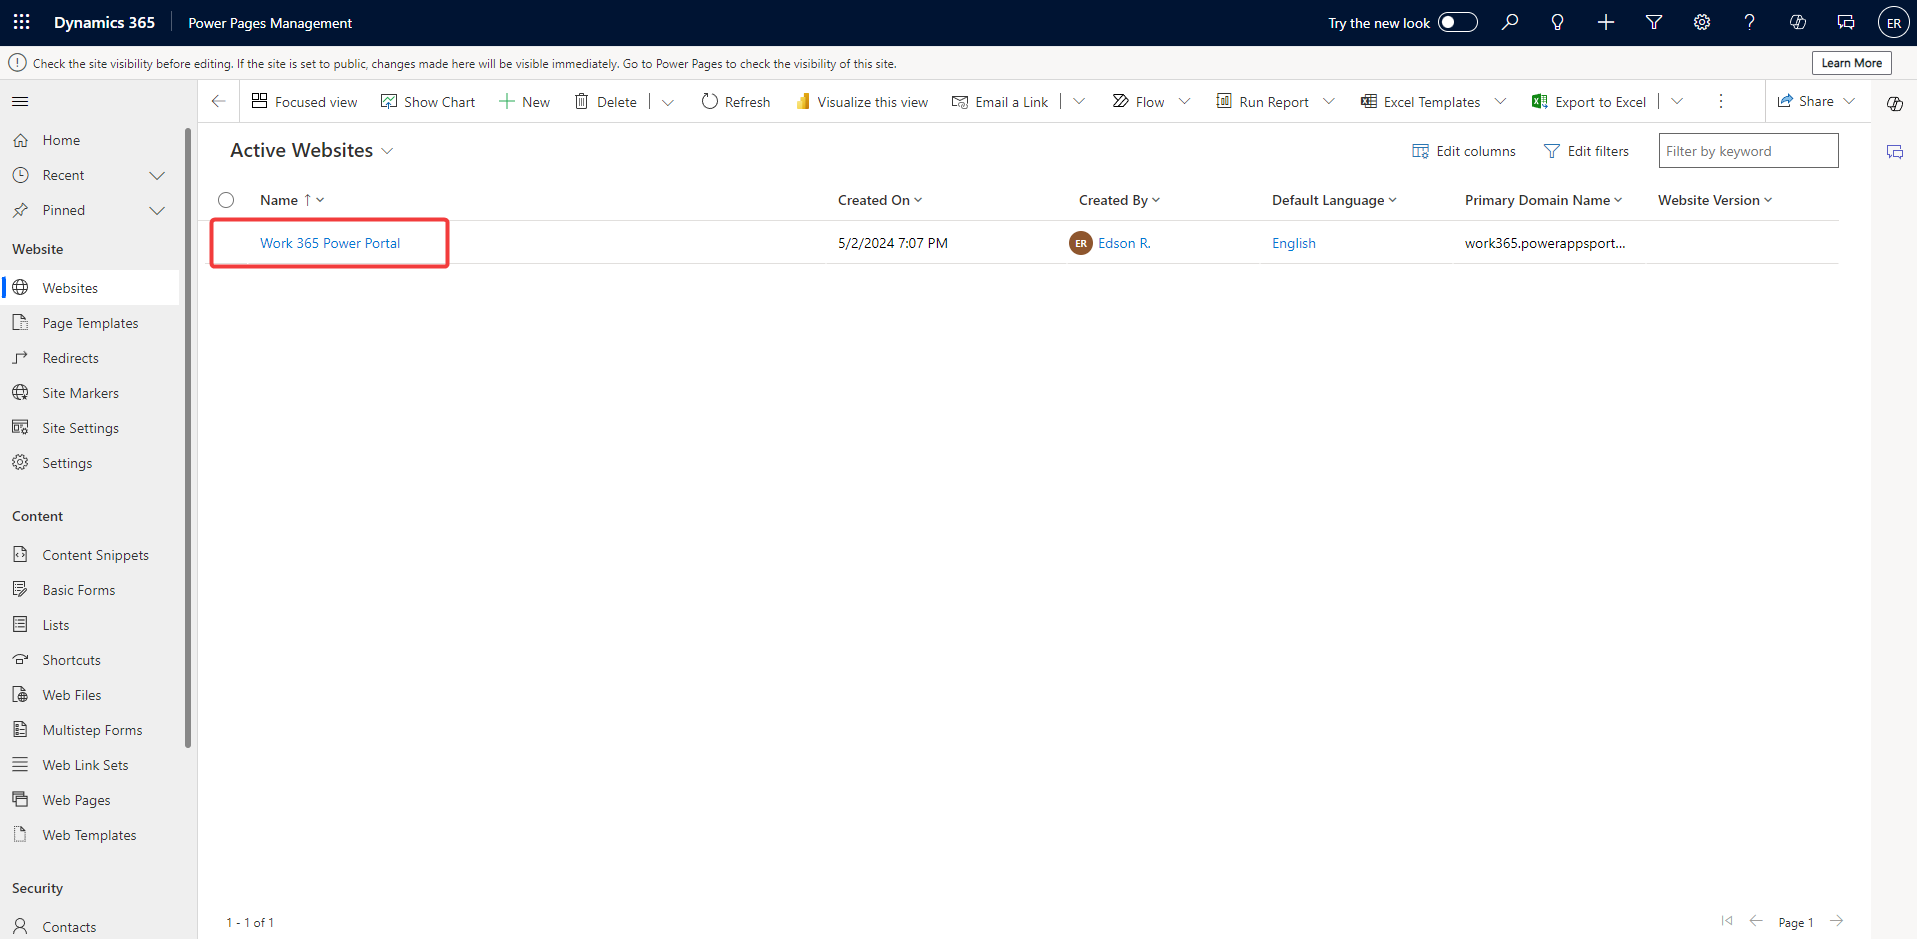
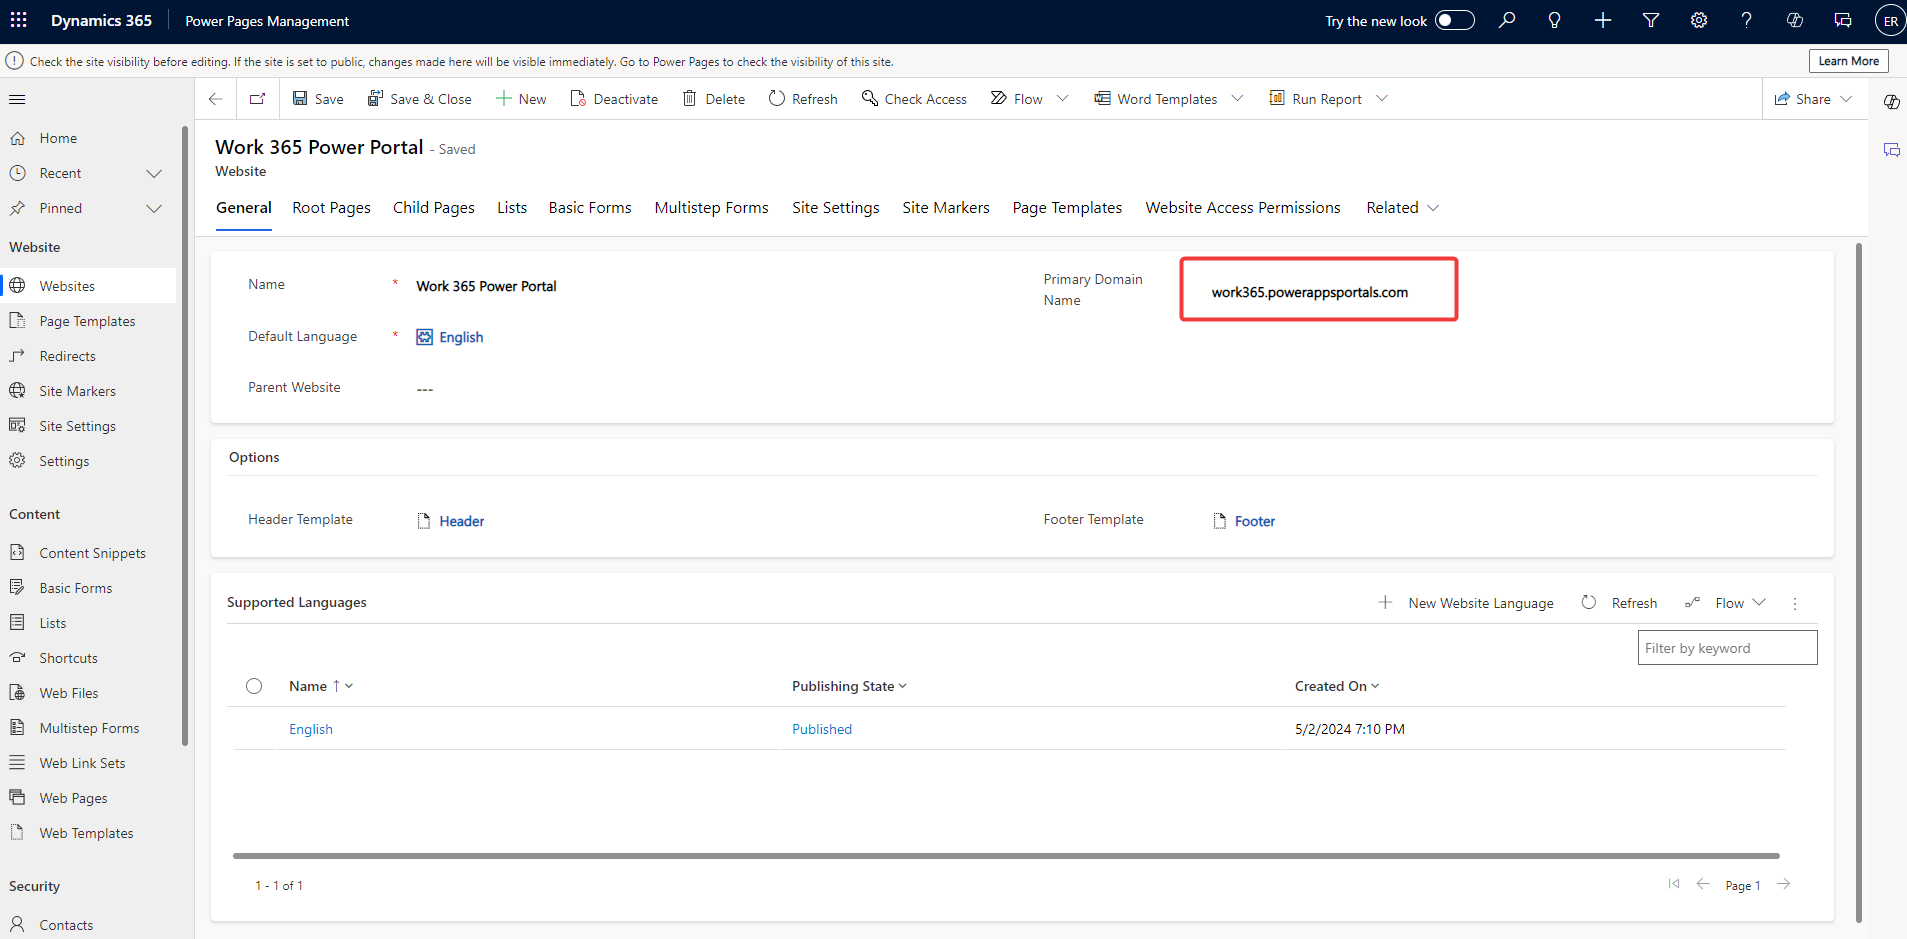
Click on 'Websites'
-
Modify the Website URL value to your URL without the 'https://'
The Work365 Power Pages Portal solution has been installed
Updated 9 months ago
