
Sending the Work 365 Invoice
Sending invoices promptly and accurately is crucial for maintaining healthy cash flow and customer satisfaction. Work 365 offers multiple methods to send invoices to clients, ensuring flexibility and efficiency in your billing processes.
Key Concepts
- Invoice Delivery Methods: Work 365 provides options to send invoices via email or through the Self-Service Portal.
- Email Templates: Predefined templates that standardize the content and appearance of invoice emails.
- Self-Service Portal: A platform where customers can view and download their invoices.
How It Works
Work 365 allows you to send invoices using different methods to cater to your organization's and clients' preferences.
Sending Invoices via Email
Manual Method:
-
Send the Invoice:
-
Go to the desired Invoice Record
-
Click on the Work 365 dropdown button.
-
Select Send.
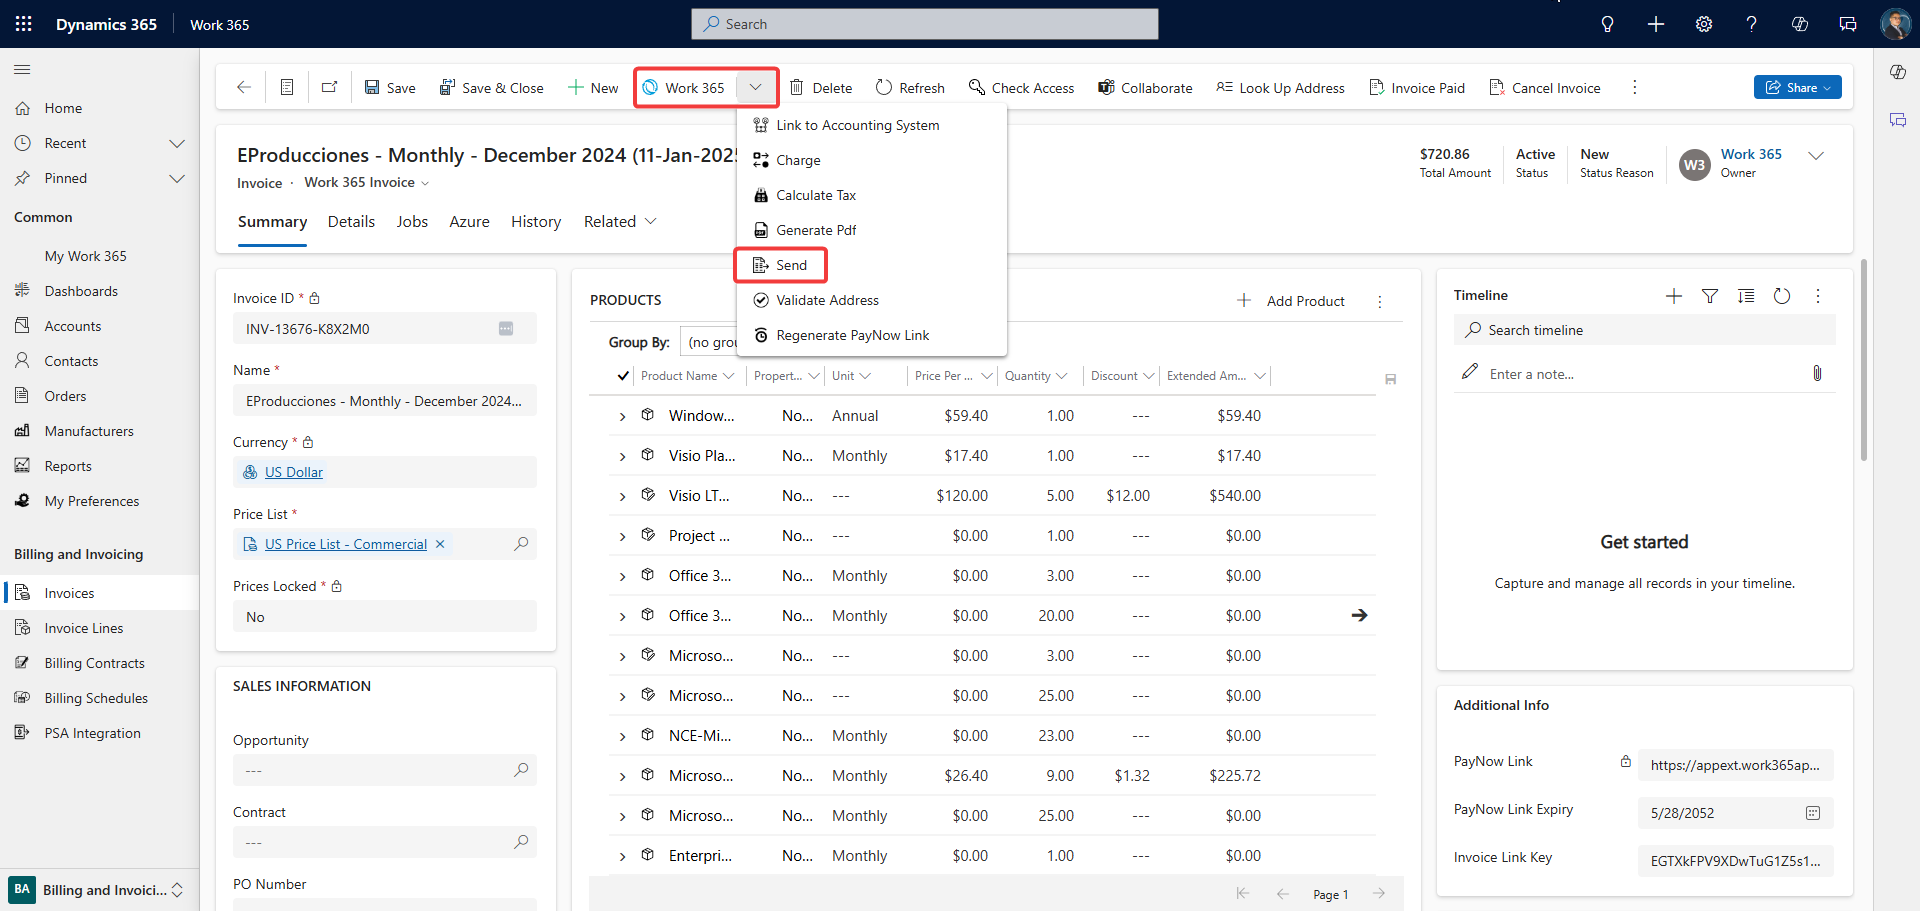
CSV files, created from consumption provided on the subscription record, will not be automatically included in the invoice send.
-
-
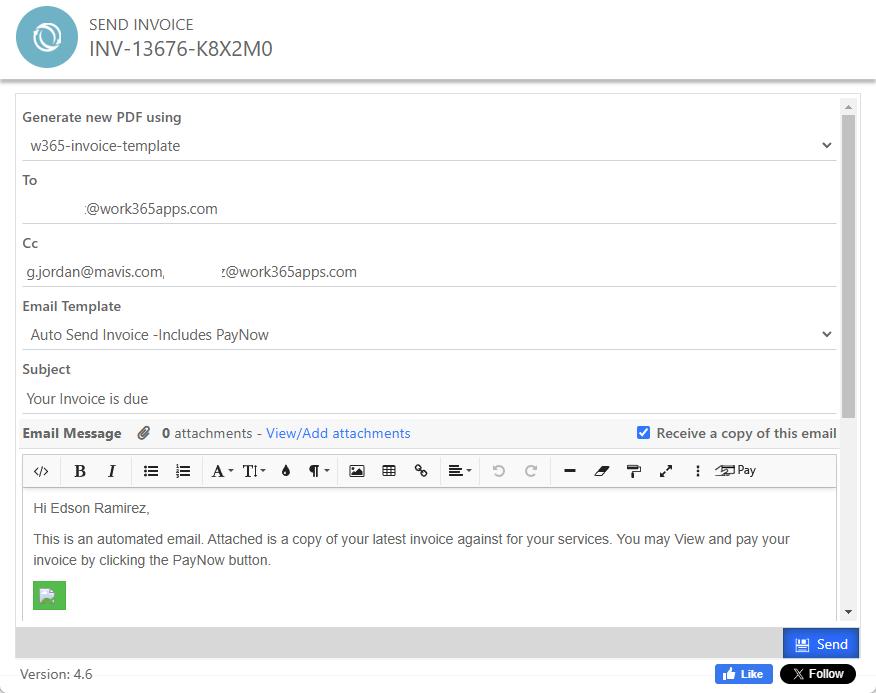
Confirm Email Details:
-
Review the email content populated from the predefined template.
-
Ensure the recipient's email address is correct.
-
Click Send.
-
If an invoice is manually generated by Work 365, users will be able to select the invoice template which will determine the PDF invoice template in the email.
Automated Method:
-
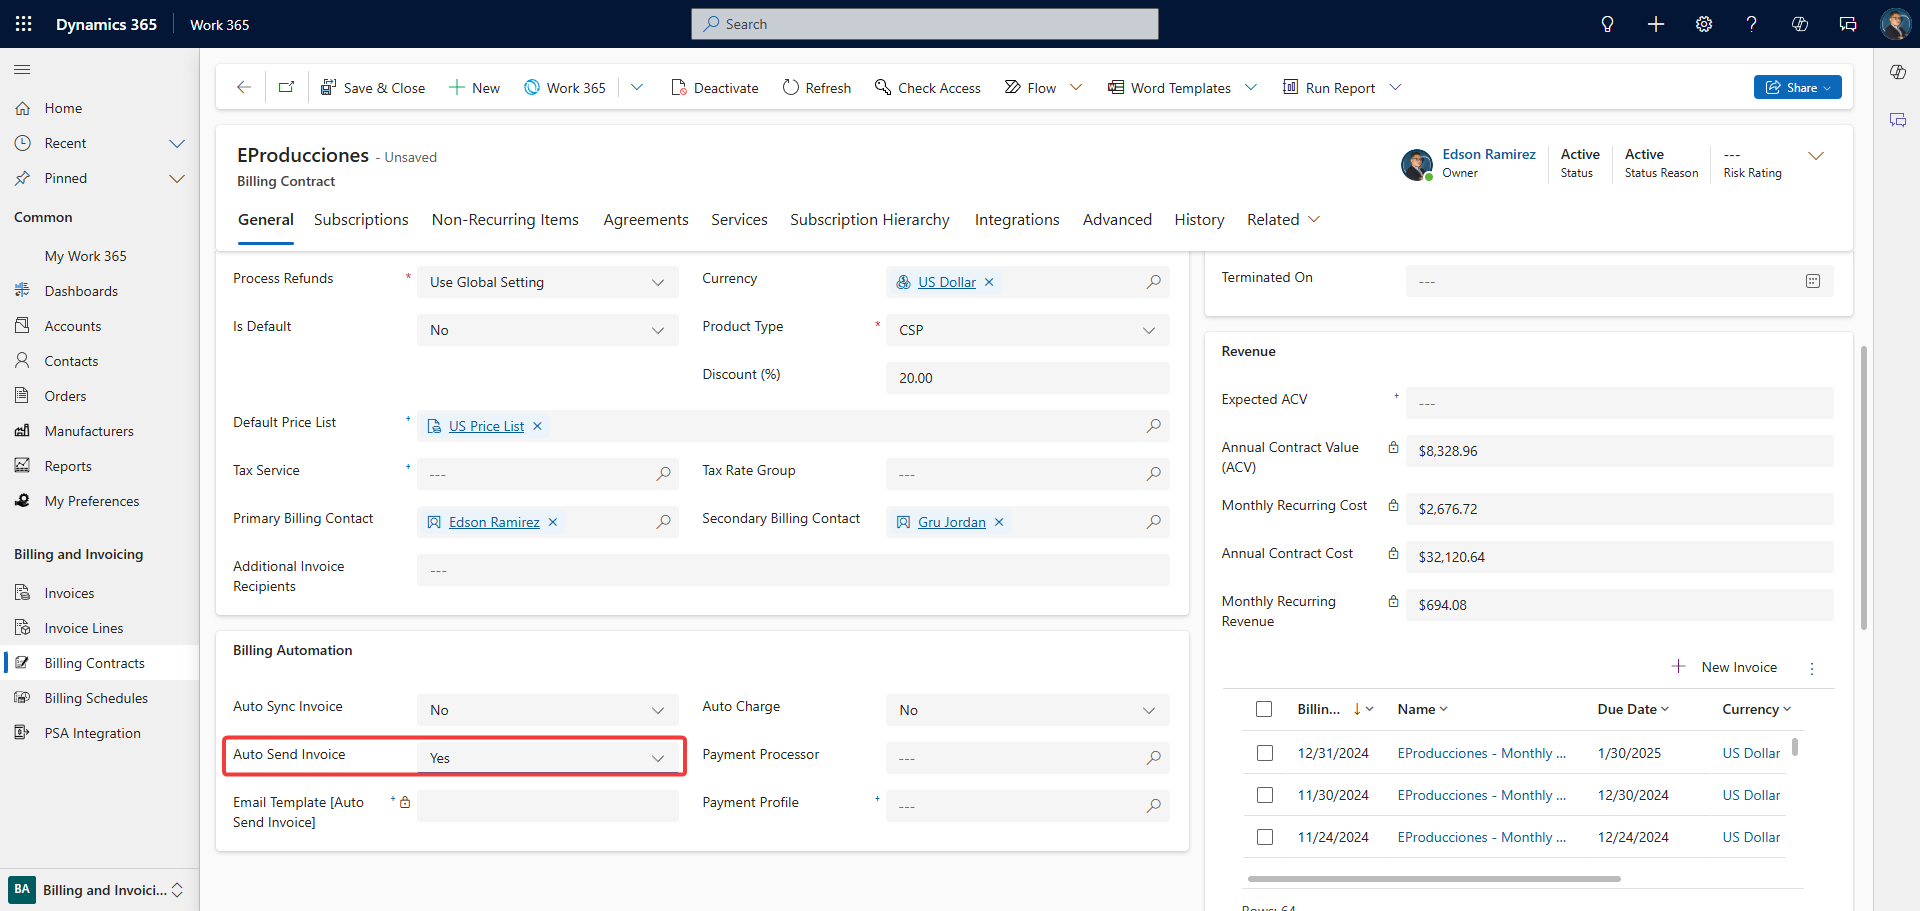
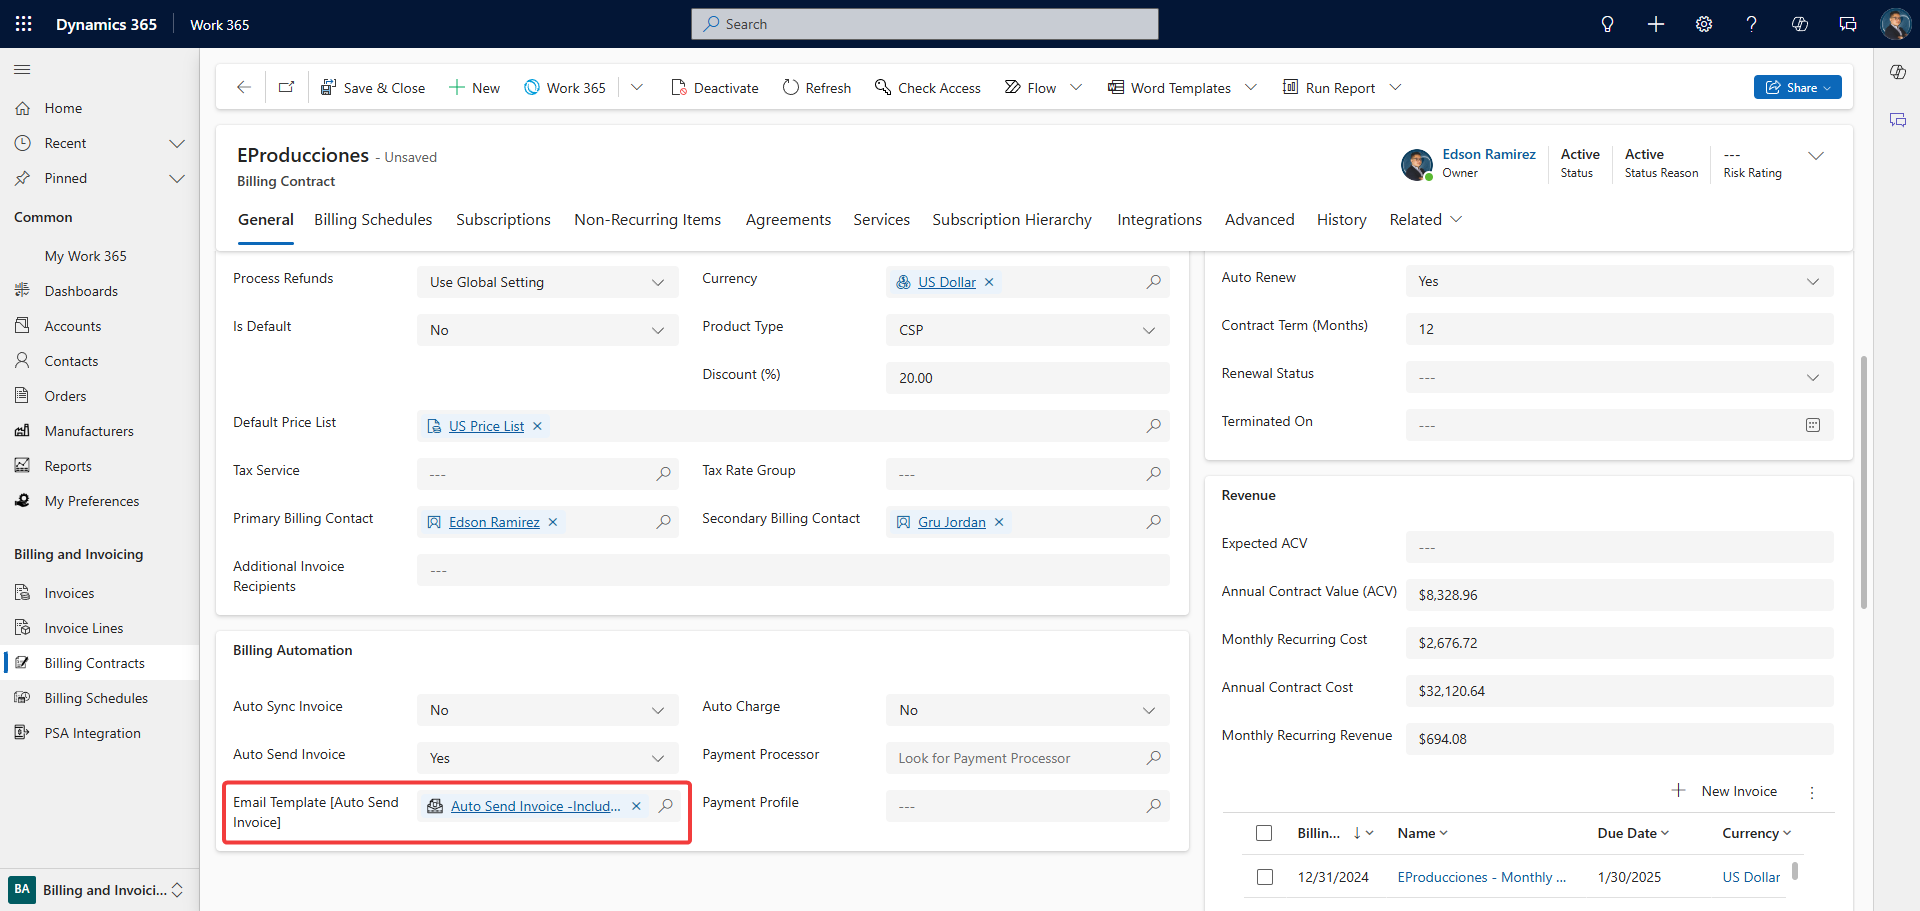
Configure Auto-Send Settings:
-
Open the relevant billing contract.
-
Set Auto-Send Invoice to Yes.
-
-
Invoice Generation:
-
When an invoice is generated for this billing contract, Work 365 will automatically send it to the customer using the redefined email template.
-
CSV files, created from consumption provided on the subscription record, will not be automatically included in the invoice send.
To include the csv file, users can use the manual send feature on the invoice record.
Providing Invoices via the Self-Service Portal
Bulk Sending Invoices
- Work 365 users can bulk send invoices to multiple different customers. To Bulk Send invoices go to Work 365 > Billing and Invoicing > Invoices > Select the invoices which will be sent > Hit Send.

-
A confirmation popup message will confirm this action
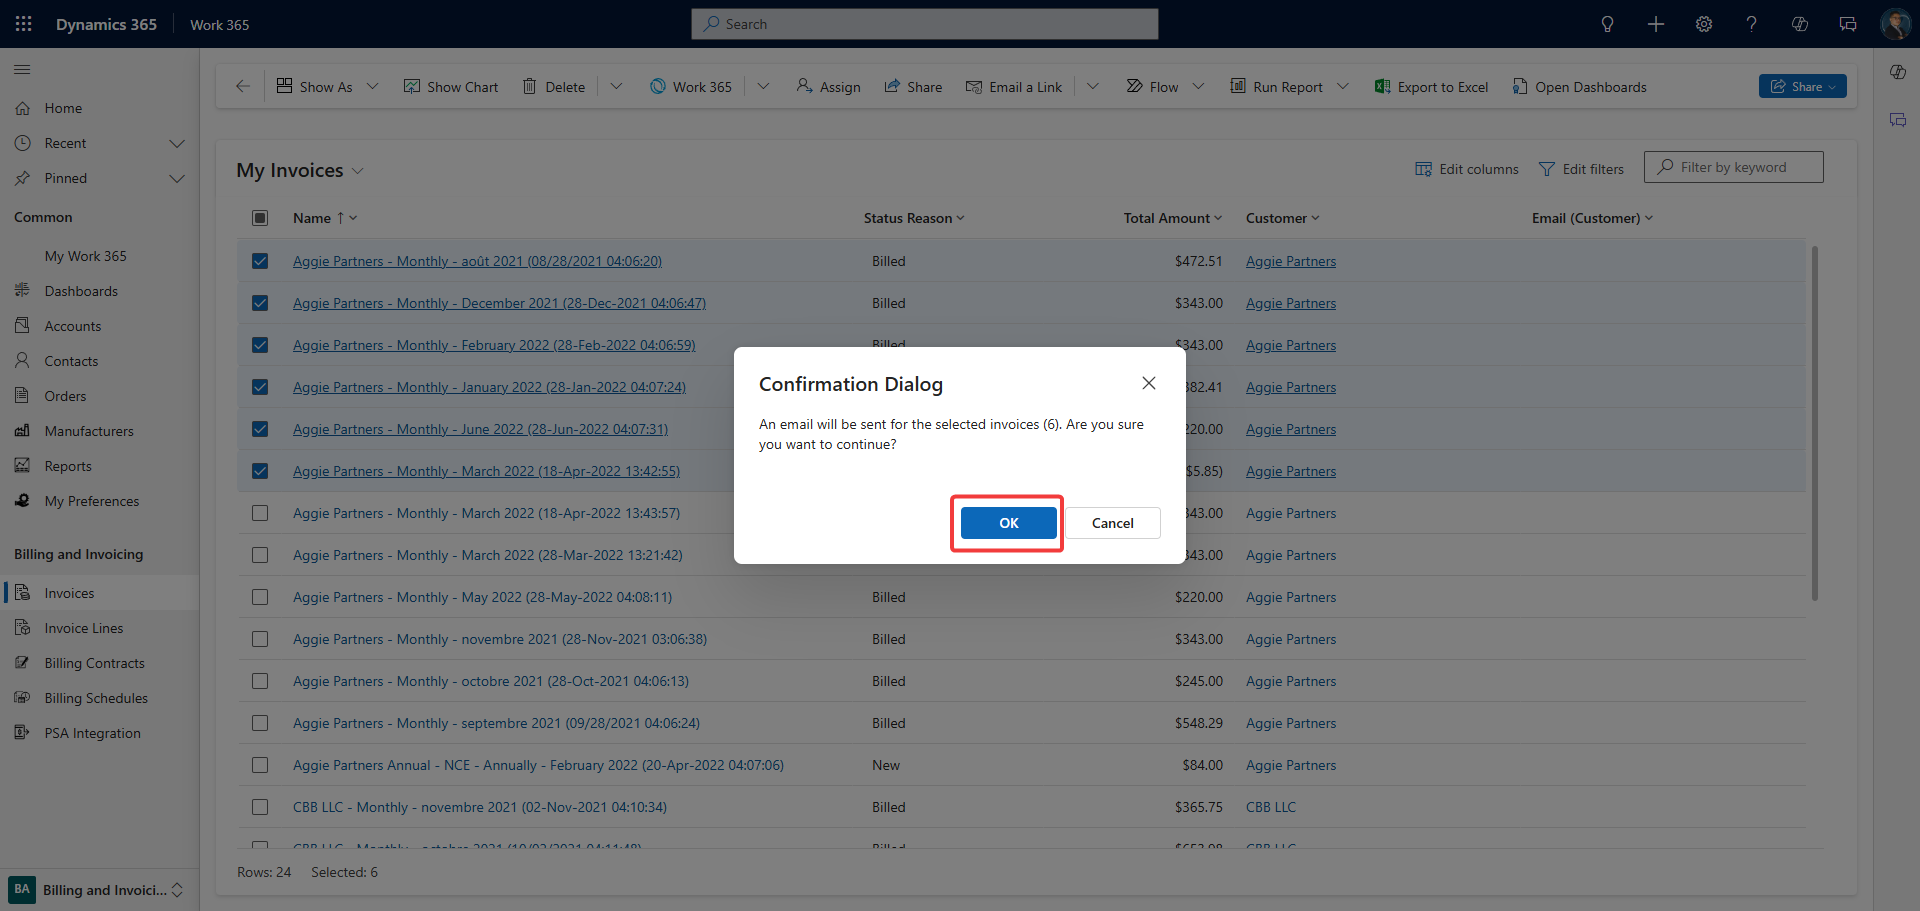
The invoices will be sent in bulk. Note: the email template used for the bulk sending of the invoices is the Auto Send Invoice email template.
Use Cases
- Automated Billing: Set up auto-send for recurring invoices to streamline the billing process.
- Manual Review: Manually send invoices when a review is necessary before dispatch.
- Customer Portal Access: Encourage customers to use the Self-Service Portal for easy access to their invoices.
Better Practices
- Verify Email Templates: Regularly review and update email templates to ensure accurate and professional communication.
- Monitor Delivery Status: Use the Email Delivery Report to confirm that invoices are successfully delivered.
- Encourage Portal Usage: Promote the Self-Service Portal to customers for efficient invoice retrieval.
Additional Resources
FAQs/Common Questions
Q: Can I customize the email template used for sending invoices?
A: Yes, you can modify the email templates in Work 365 to align with your branding and messaging.
Q: What happens if an invoice email fails to deliver?
A: You can resend the invoice manually or provide it through the Self-Service Portal.
Q: Is it possible to send invoices to multiple recipients?
A: Yes, you can add multiple email addresses in the recipient field when sending the invoice.
Updated over 1 year ago