
Notifications
This article provides the steps to configure your Self-Service Portal Notifications.
Pre-requisites
Performing this provisioning will require the following:
- A user with System Admin or System Customizer privileges on the tenant
- Work 365 Self-Service Portal solution previously installed
Time required
This configuration is expected to take approximately 15 minutes
Overview
Work 365 Portal Notification solution provides automated flows which can drive notifications for events triggered via the Portal.
Below are the list of 4 events on the Portal which trigger the email notifications.
Description
- Subscription Quantity Update
An email notification is triggered to an internal user/email id (configurable) when there has been a quantity change on a Subscription where the Provider is either 'Manual Provider' OR 'Null Provider'
Sample email screenshot

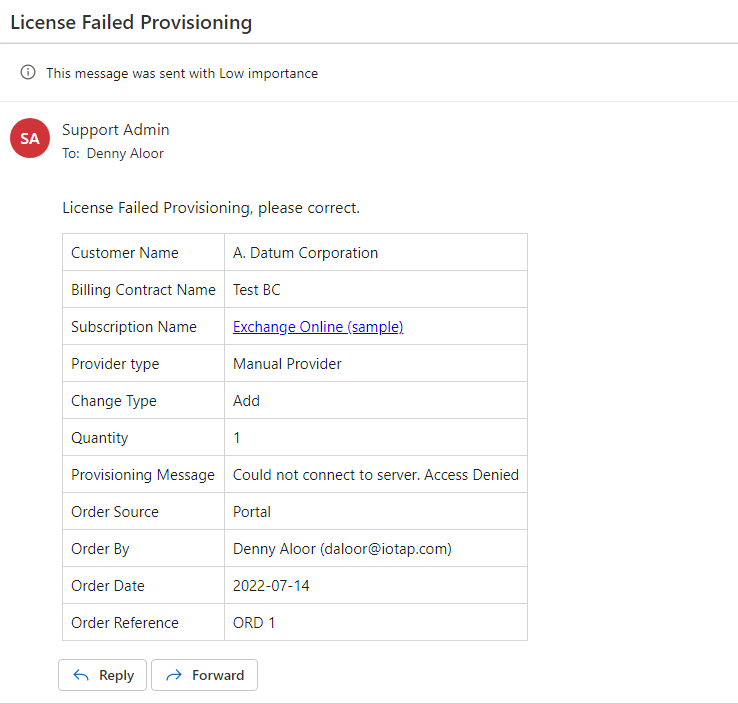
- License Provisioning Failed for a Subscription
An email notification is triggered to an internal user if there was any error encountered while provisioning license for the Subscription.
Sample email screenshot
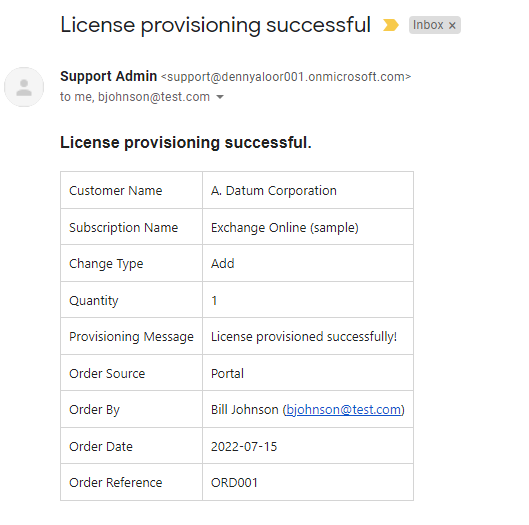
- License Provisioning Successful for a Subscription
An email notification is triggered to the portal user who you updated the Subscription quantity, when the license is successfully provisioned for the Subscription.
The primary contact defined on the Billing Contract of the Subscription (in CRM) also receives a copy of this email.
Note : The email is sent only if the subscription Billable Status is 'Billable' (within CRM)
Sample email screenshot
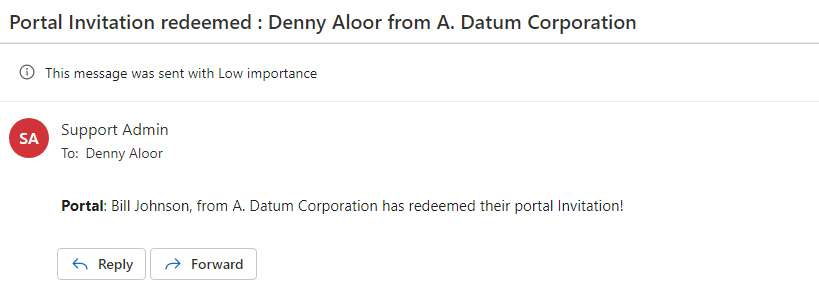
- Portal Invitation Redeemed
An email notification is triggered to an internal user when an invitation has been redeemed by a Portal User.
Sample email screenshot
Procedure
-
Click here to download the latest ‘Work 365 Portal Notification’ solution.
-
Navigate to https://make.powerautomate.com/ using an account which has System Administrator role.
-
You may have multiple CRM environments. Ensure you are within the correct CRM environment
-
-
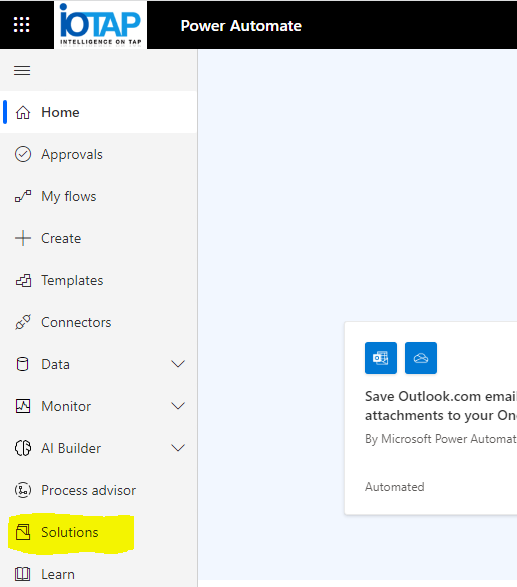
Click on ‘Solutions’ on the left-hand side pane
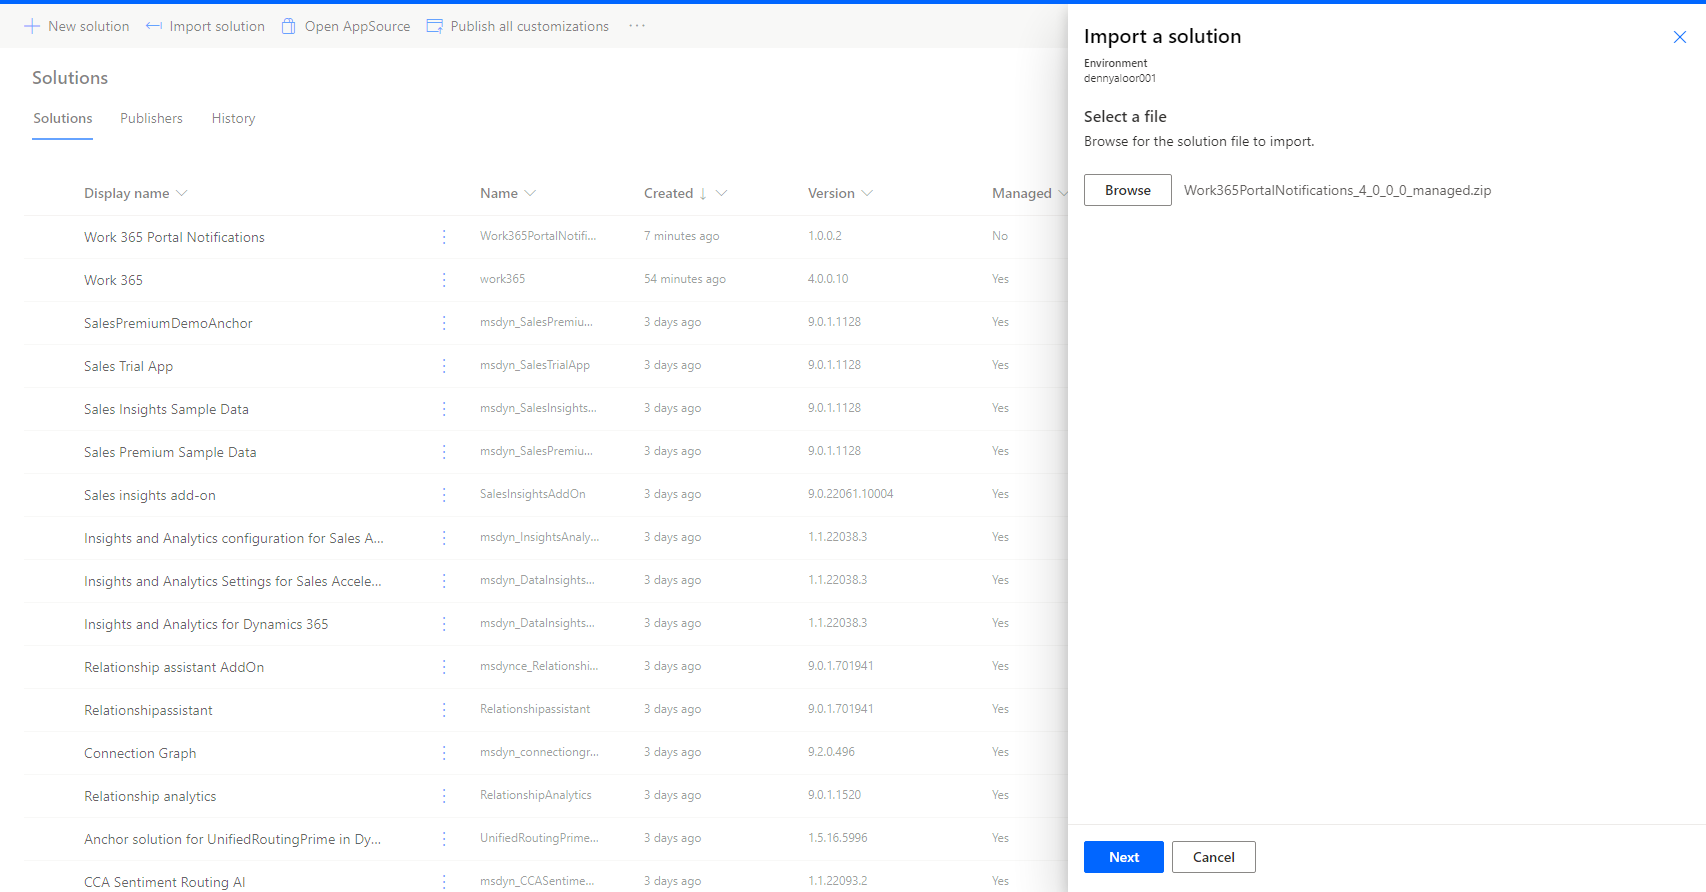
- Search for the ‘Work 365 Portal Notifications’ solution.
If you have any prior version of the ‘Work 365 Portal Notifications’ solution (prior to ver. 4.0.0.0) you will need to uninstall to avoid duplicate emails being sent.
- Click on the ‘Import Solution’ button to launch the window below. Click on the ‘Browse’ button and select the solution file downloaded in step #1 above and hit ‘Next’
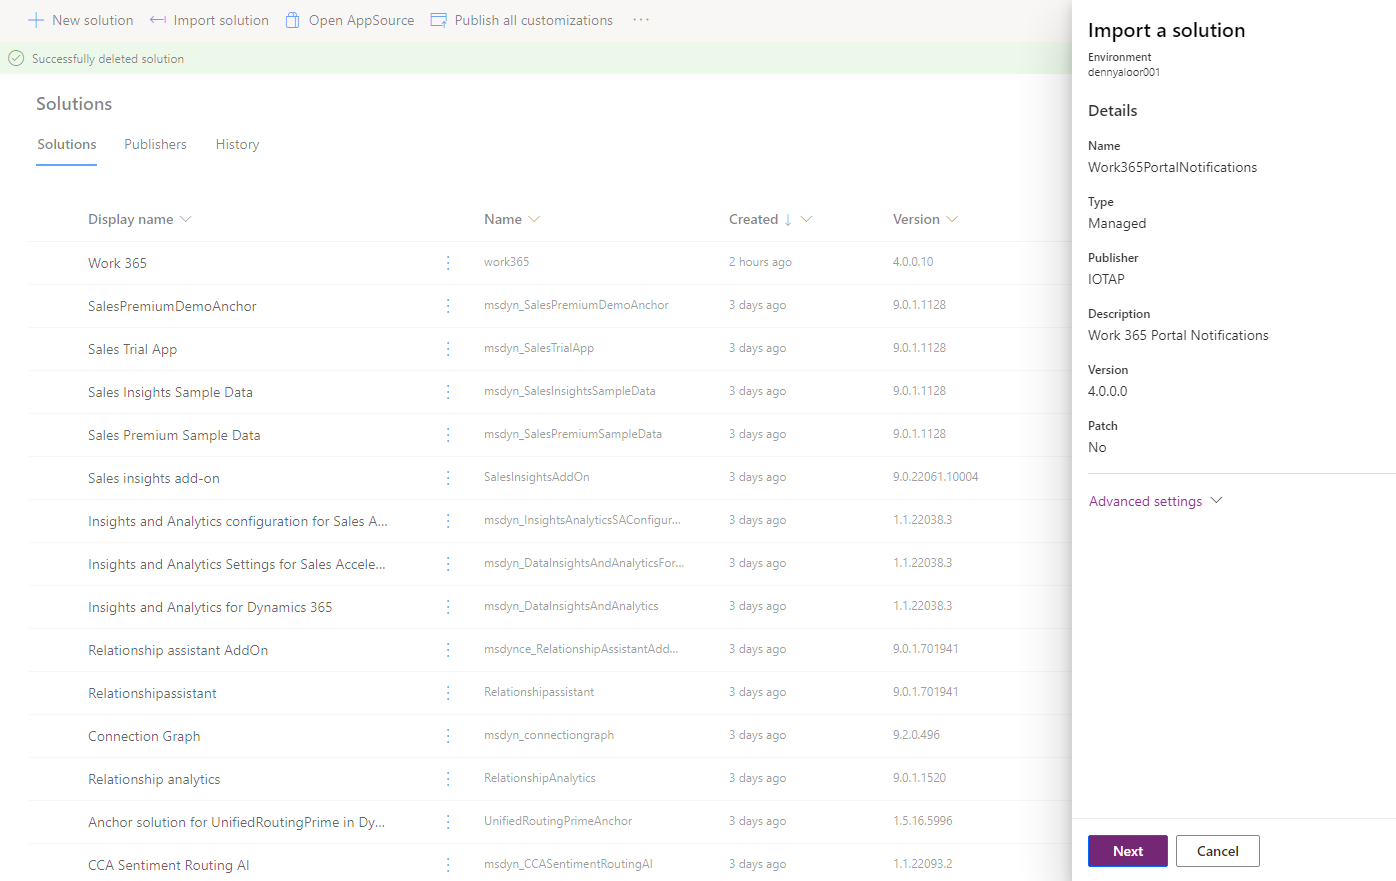
- You should now see the ‘Details’ screen which provides details on the solution which is to be installed. Click ‘Next’
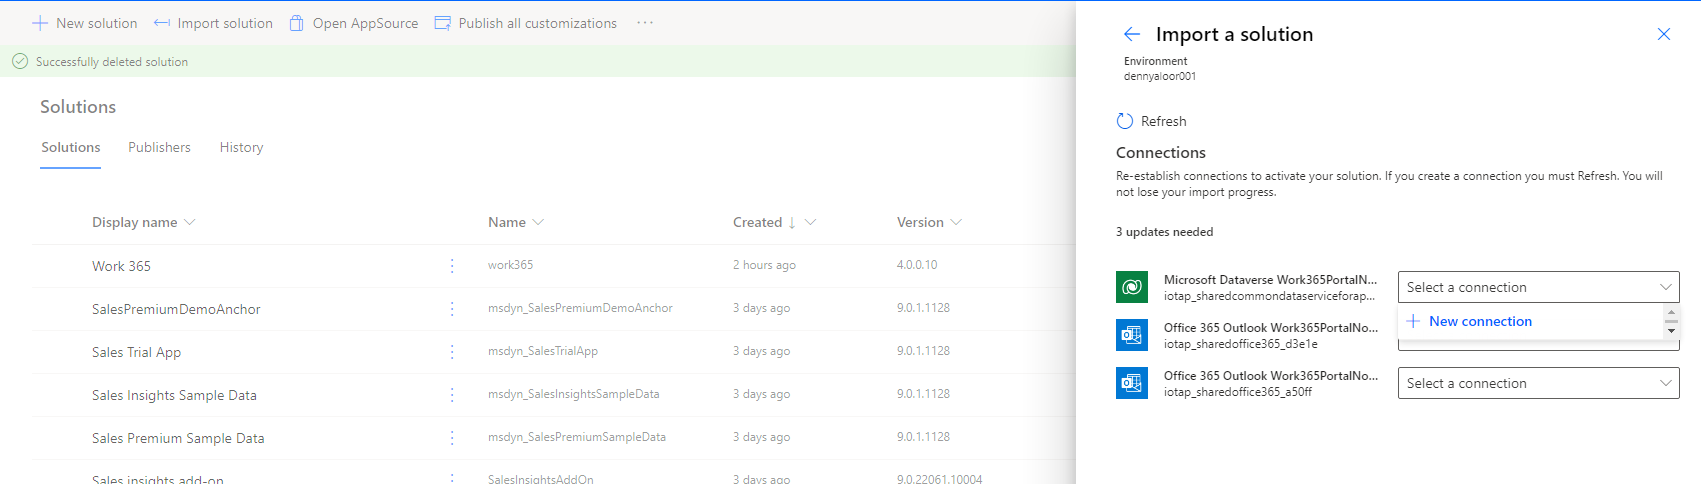
- Power Automate needs an account thru which it can perform the required actions.
In this case we need to connect to Dataverse/CRM to read relevant data, and use Outlook/Exchange to send the notification emails.
These credentials need to be set on the screen below.
For the Dataverse option click ‘New Connection’
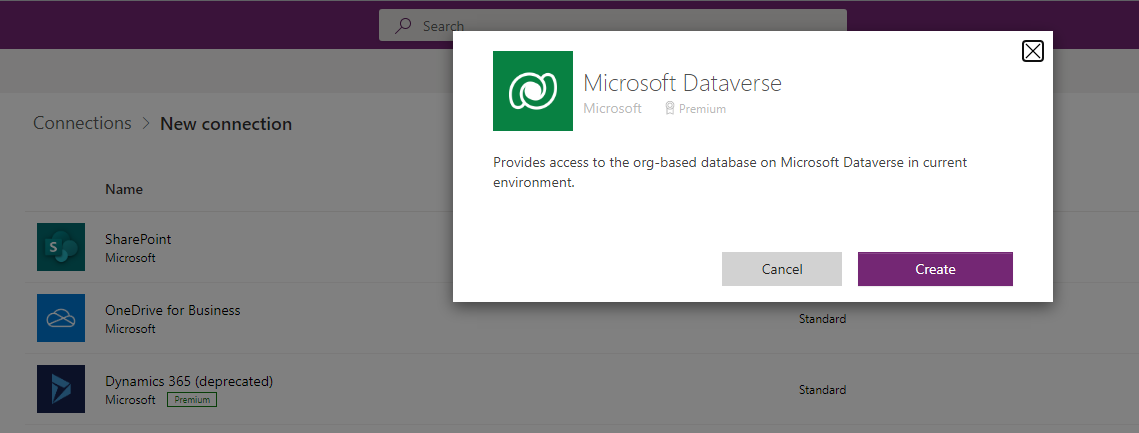
- This is would the connection wizard screen (in a new browser tab) as below. Click the ‘Create’ button which would prompt you to login again.
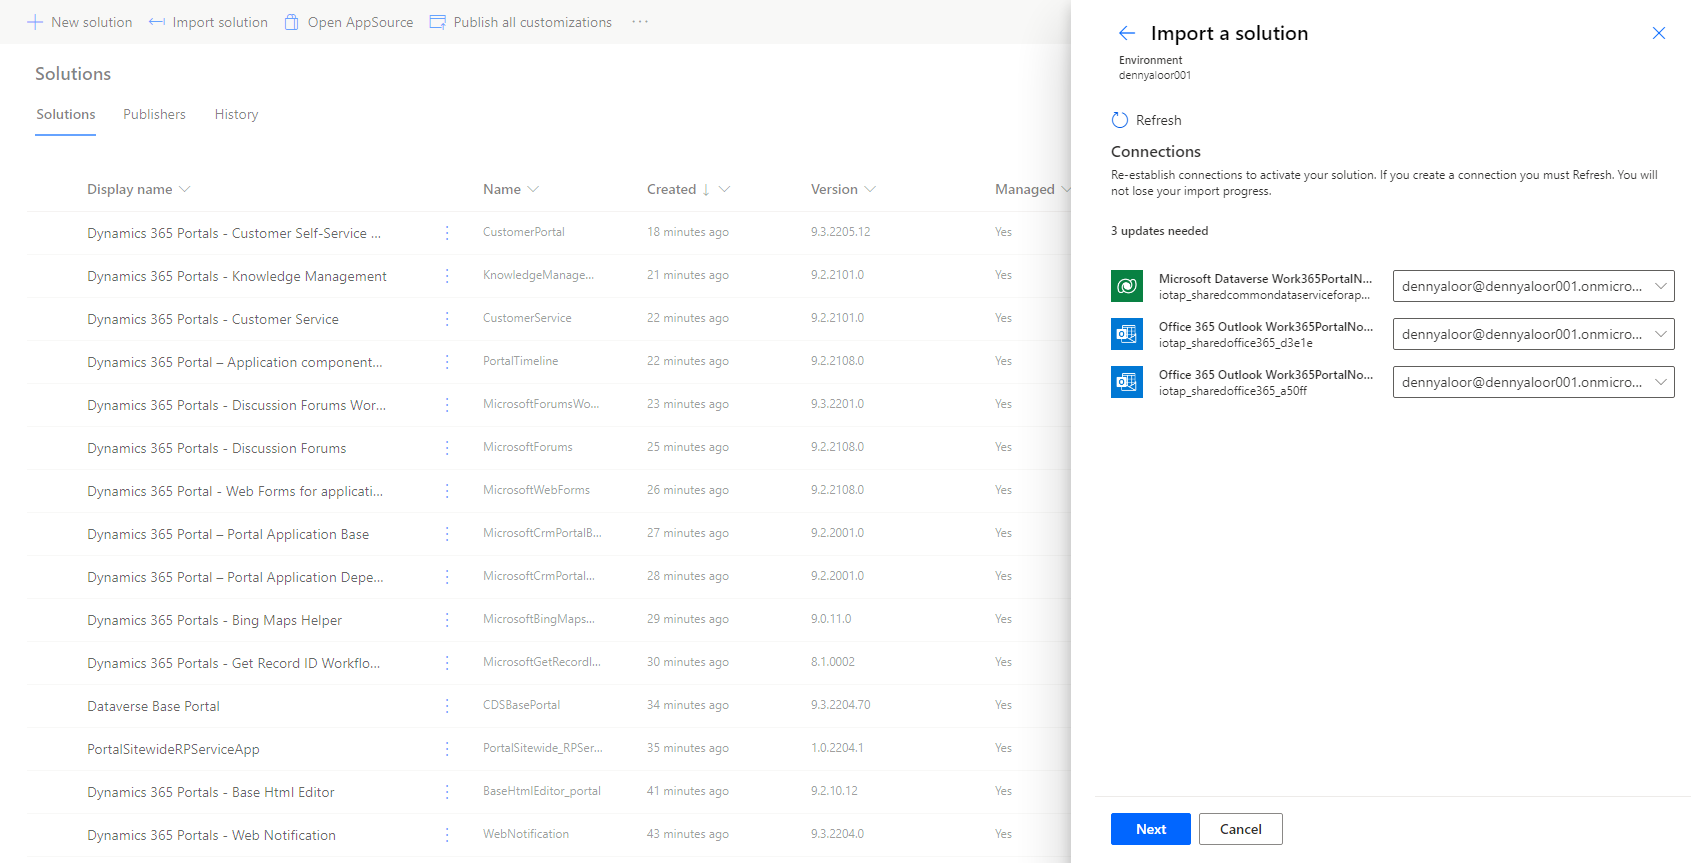
- Once the connection has been created, go back to the previous tab where you should now see a ‘refresh’ option
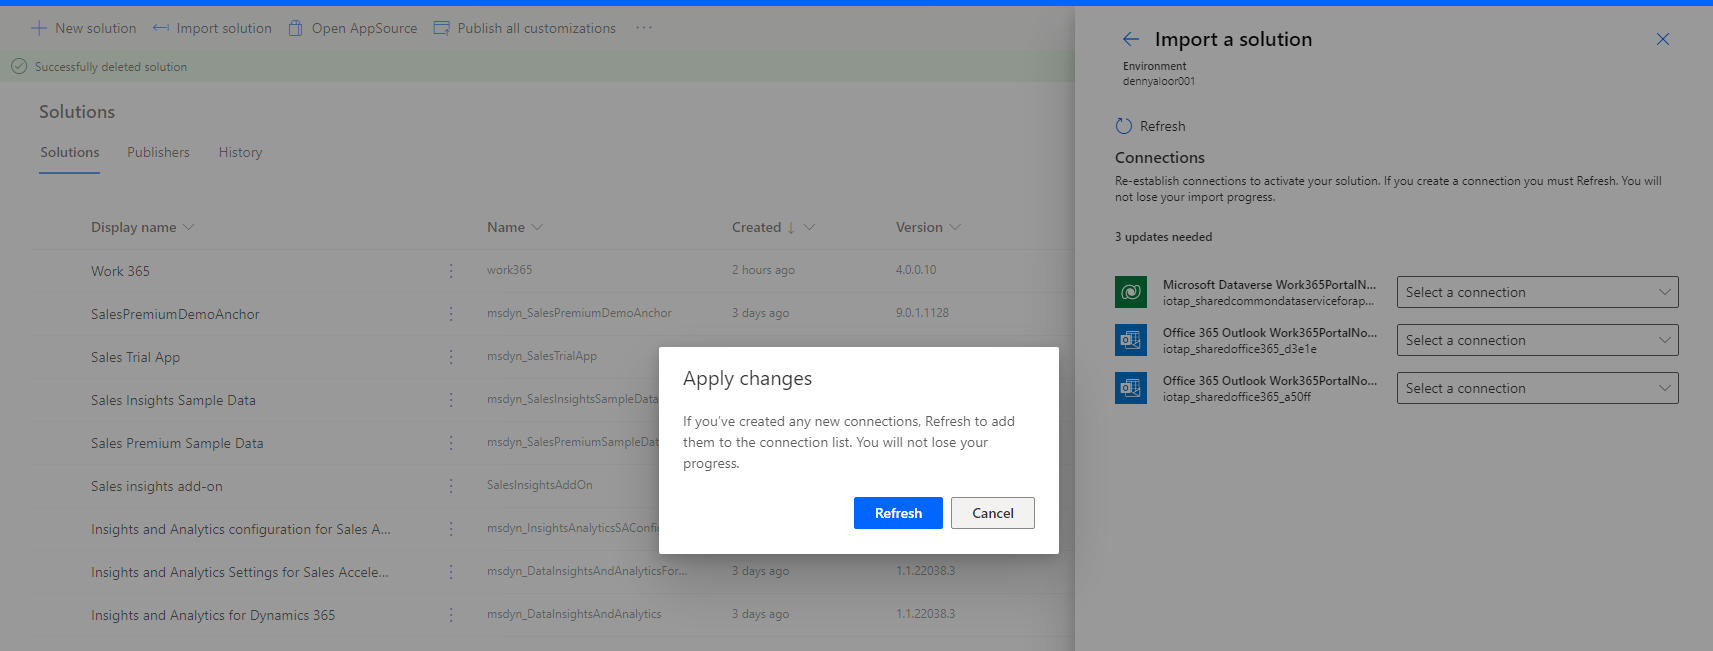
- Follow a similar process for the 2 connections for Outlook.
Note: Make sure to use an account with Exchange Online license for this connection.

- Once the connections are successfully created and populated click the ‘Next’ button
- The next screen is a configuration page which needs to be configured as below
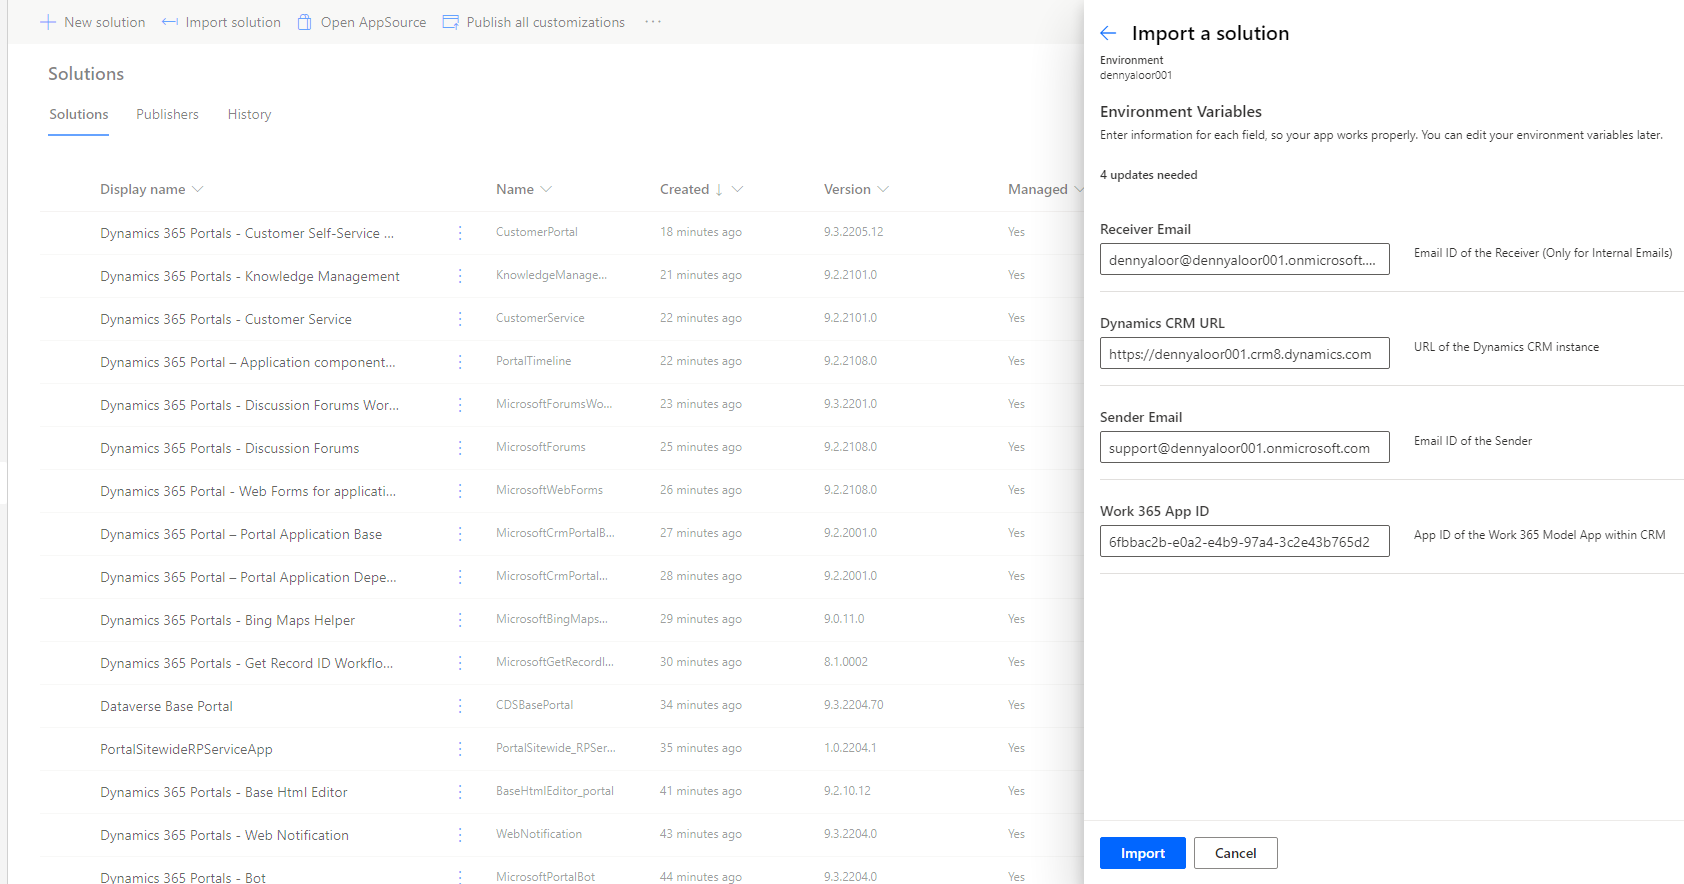
Receiver Email: Email address of an internal user or Distribution list.
This email address will receive the ‘License change on Manual Provider’ notification
Dynamics CRM URL: URL of your Dynamics CRM instance
E.g.: https://dennyaloor001.crm8.dynamics.com
Sender Email: Email address of an internal user or Distribution list.
This email address will be used as the sender for all the email notifications.
There should be a valid Exchange Online license associated with this email address.
Note: If the email address provided here is different from the email address of the user used for the outlook connection in step #10 above, then the user in step #10 needs to have ‘Send As’ permissions on this email address/mailbox. (configured within Exchange Online Administration)
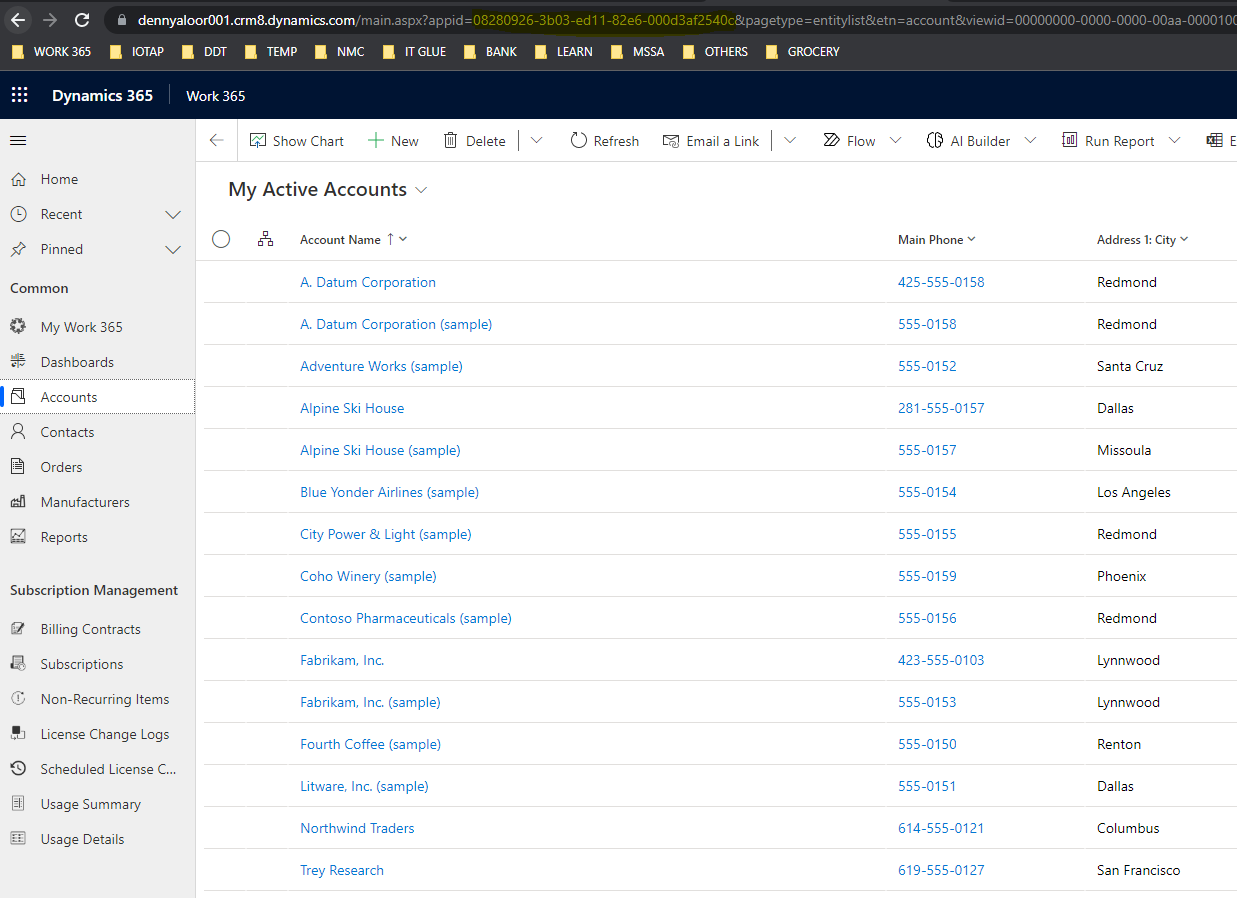
Work 365 App ID: ID of the Work 365 Application installed in CRM.
Open the Work 365 application in CRM, and you should notice the App ID on address bar (sample screenshot below)
If there is a need in future to update these configuration values, the same can be done from within CRM by following the steps below
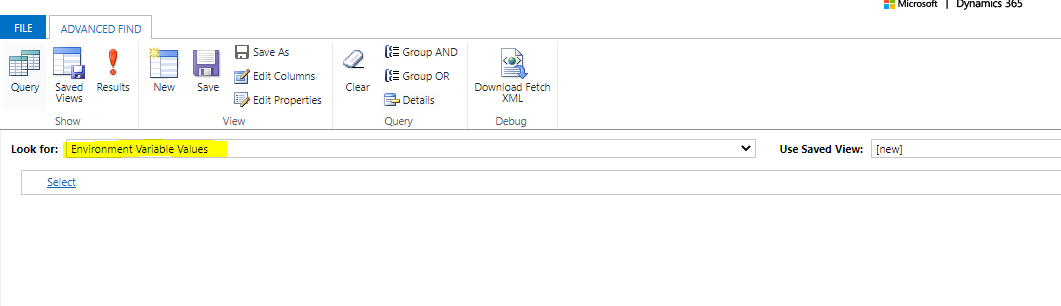
Open ‘Advanced Find’ and look for ‘Environment Variable Values’.
Open the required configuration record to make the updates.
- Once all the values have been configured, click on ‘Import’
A success message should be displayed on screen once the import is completed.
Your Work 365 Portal Notifications has been successfully set up.
Updated 4 months ago