
Install Solution (Manual Process)
This article provides the steps to install the Self-Service Portal solution without the Onboarding App
Pre-requisites
Performing this setup will require the following:
- Self-Service Portal provisioned in Dynamics 365
- Self-Service Portal Azure AD Login configured
- Self-Service Portal Azure AD Manage Licenses configured
- Work 365 Core App previously Installed
- User with System Admin privileges on tenant
Time required
This setup process is expected to take 45 minutes
Additional Notes
This article will cover the setup from the Work 365 Manually. If you want to do this process using the Onboarding App, please follow this article - SSP - Install Solution
Procedure
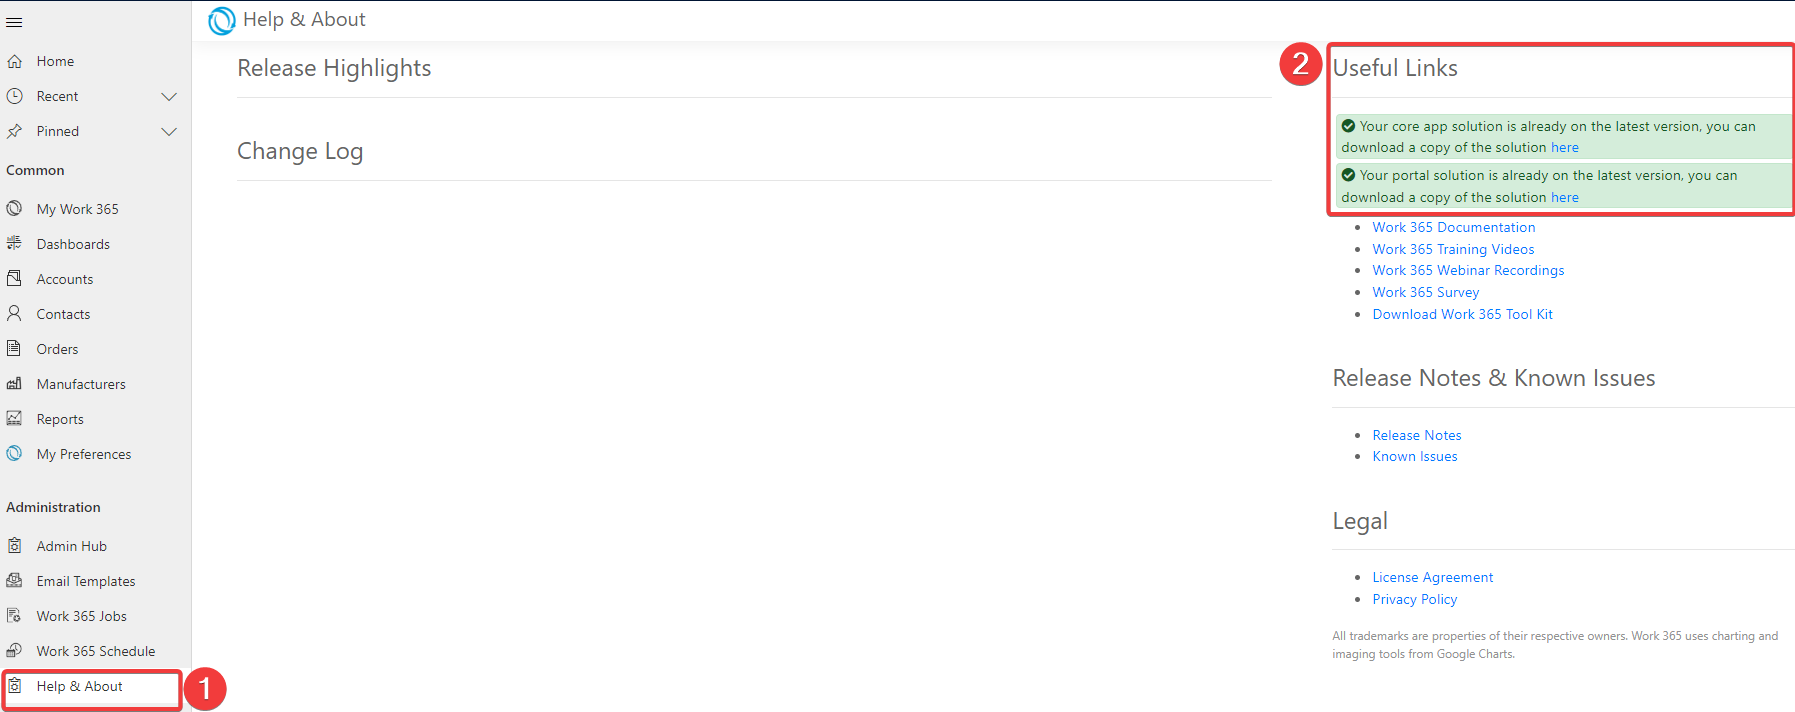
- Login into your Dynamics 365 to Work 365 and go to the bottom-lef menu.
- Click on 'Administration'
- Click on 'Help & About' and look at the right side of the screen for 'Useful LInks'
-
Download the latest portal solution

If you are having problems Downloading the solution please use this link instead:
US: Solution_US
EU: Solution_EU -
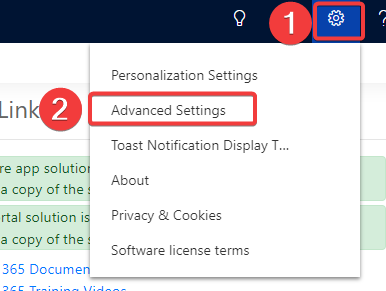
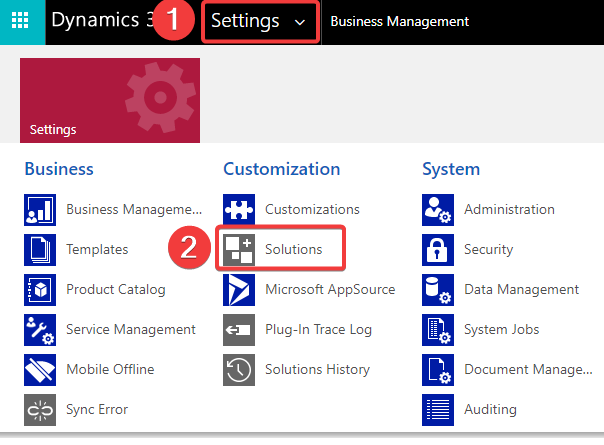
Click on the gear icon located at the top-right corner and click on 'Advanced Settings'
-
Click on the 'Settings' dropdown menu and click on 'Solutions'
-
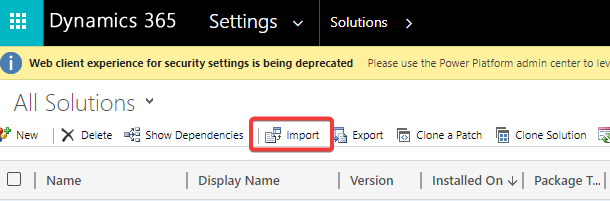
Click on 'Import'
-
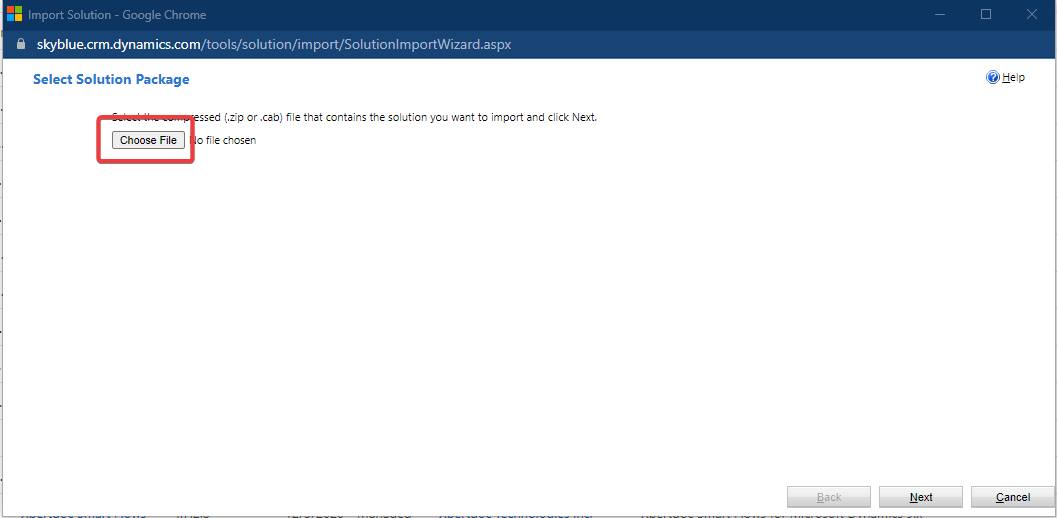
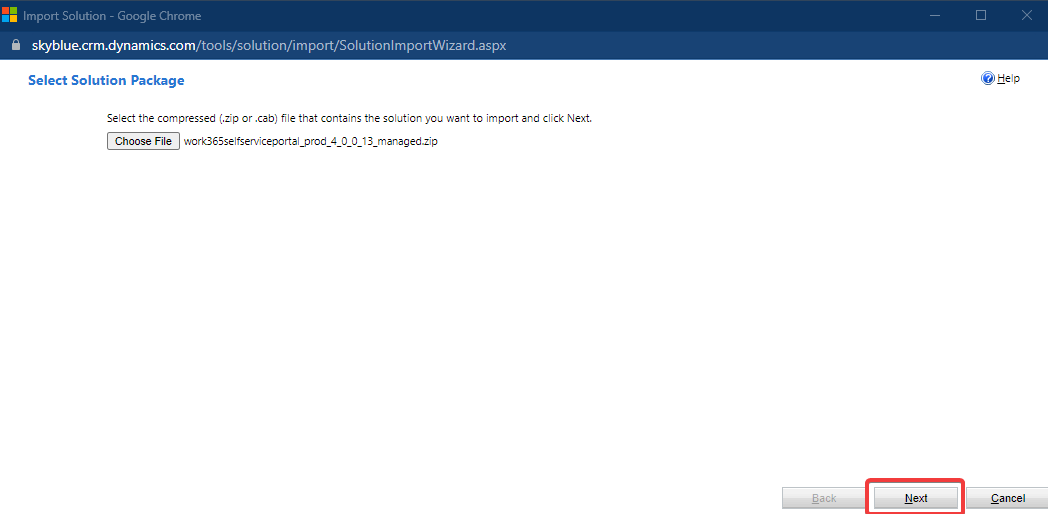
Click on 'Choose File' on the popup window
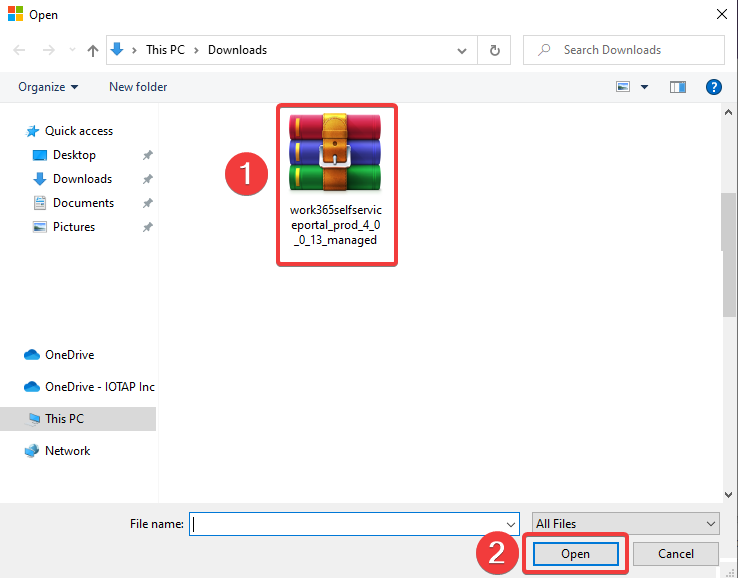
- Look for the previously donwloaded file and click 'Open'
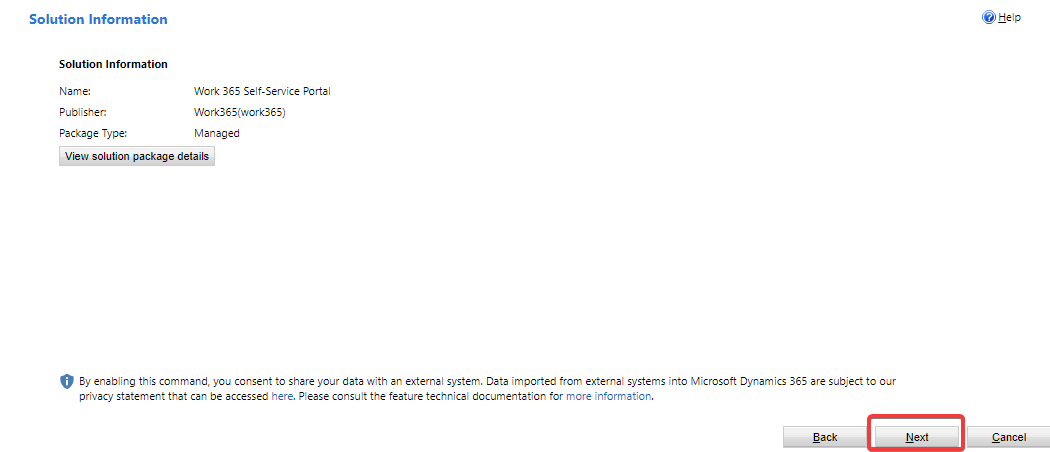
- Click on 'Next'
- Click on 'Next'
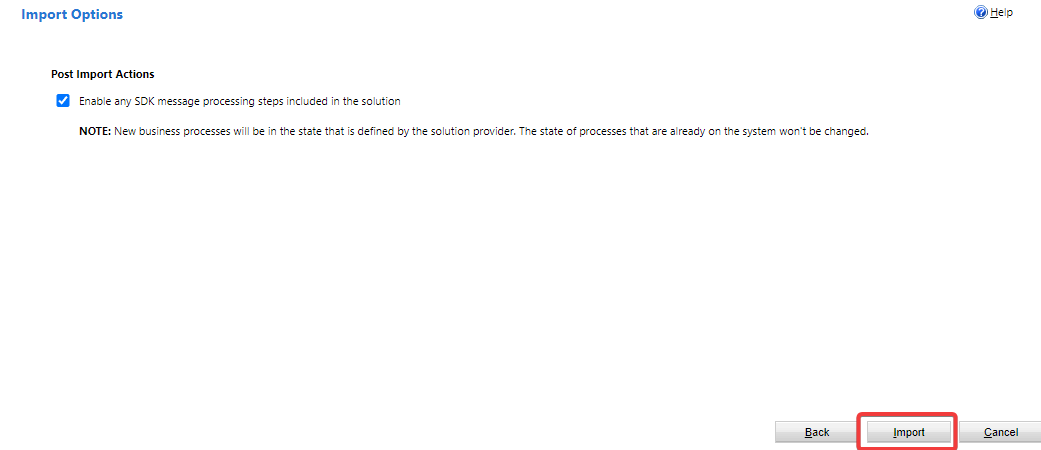
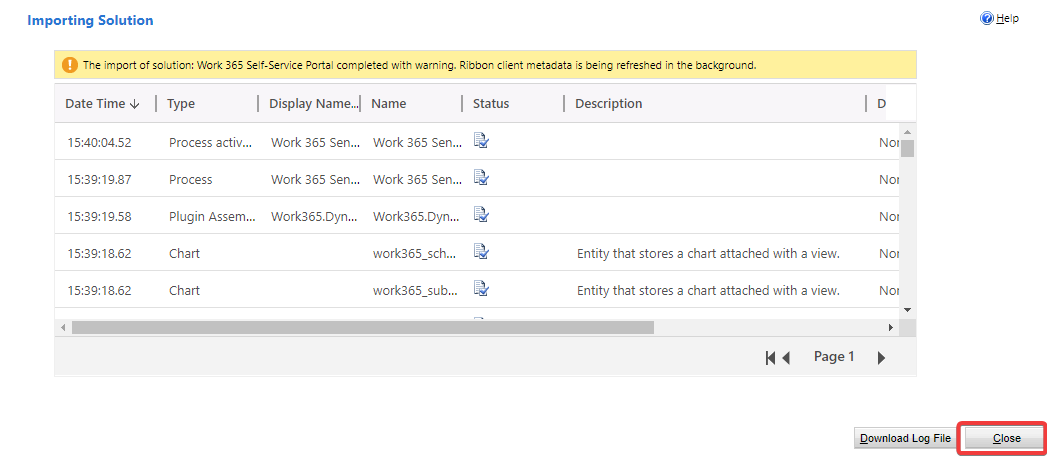
- Click on 'Import'
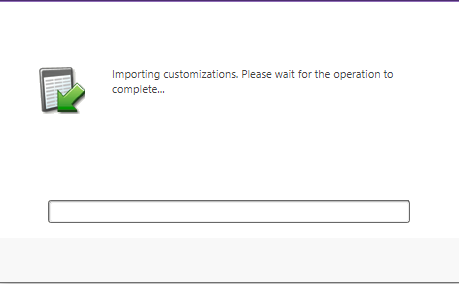
- Wait until this process is completed
- Click on 'Close'
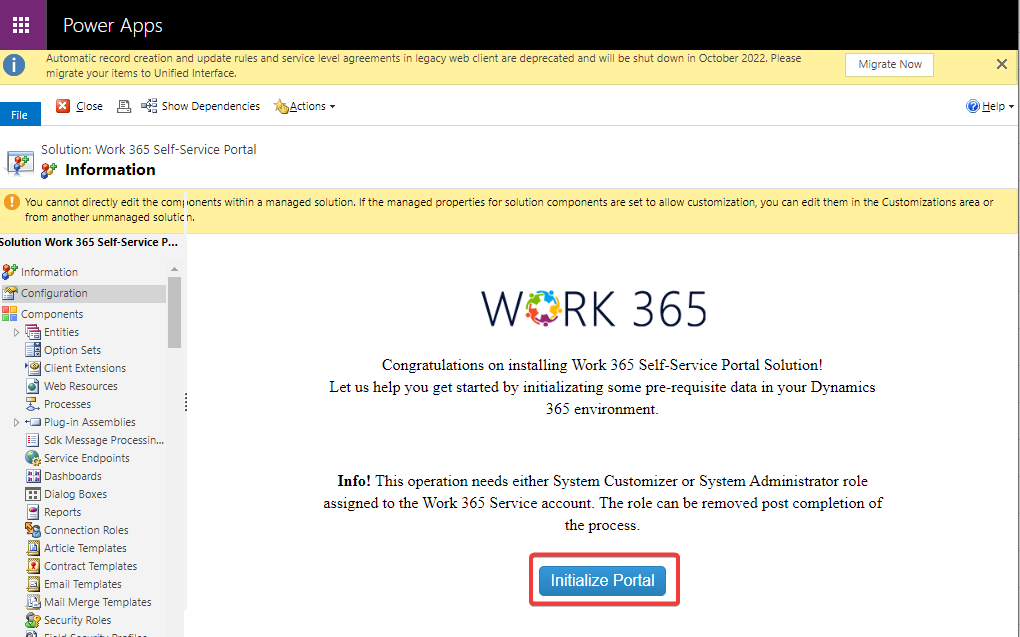
- Click on Work 365 Self-Service Portal solution's name

- Click on 'Initialize Portal' button on the popup window
-
Please ensure that the Work 365 Application User has a System Administrator role before you click the Initialize Portal. This role can be removed after the portal is initialized.
-
-
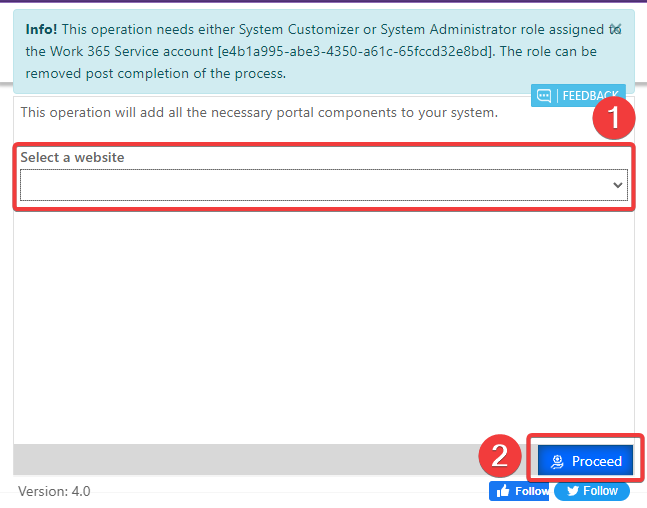
Click on the dropdown menu select your portal's name and click on 'Proceed'
-
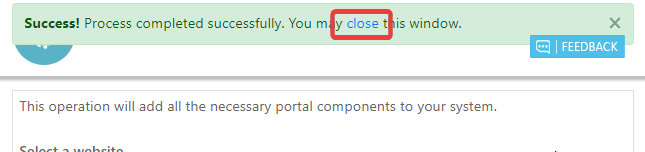
Wait until the process ends and click on 'close'
-
The Portal should update after 15 min
The Work365 Self-Service Portal solution has been installed
Updated about 1 year ago